Thursday, October 20, 2022

Birthday Fern

Cards are rather easy to create when you have coordinating products and stamps. I used the designer series paper on one side and the stamp set on the other side. What do you think?


Stamps:
   Forever Fern
   A Grand Kid

Paper:
   Pear Pizzazz A-2
   Forever Greenery DSP 2 x 5-1/2
   Basic White 5-1/4 x 4 (Inside)

Ink:
   Pretty Peacock
   Shaded Spruce

Technique:
   CAS

Accessories:
   Butterfly Gems
   Black Glitter Washi Tape
   Adhesive

First, I stamped the sentiment on the right center of the Pear Pizzazz card front, using Pretty Peacock ink.

I then stamped the various images around the sentiment. The floral image was stamped using Pretty Peacock and the leaves were stamped using Shaded Spruce.

Next, I cut and adhered the DSP to the left side of the card front.

I added a strip of Black Glitter washi tape for a bit of glimmer and to hide the seam.

Lastly, I added a few Butterfly Gems and adhered the Basic White panel to the inside of the card.

Thank you so very much for being here. I appreciate you taking the time to glance at my work. Please Contact Me if I can be of service.

Are you interested in Stampin' Up! products to make your own cards? Shop Now and have a look-see. I placed a HOST CODE for you to use if you do not earn your own rewards. It is sitting in the right sidebar.

Do you like surprises? Subscribe to our Paper Pumpkin and receive all you need to complete the monthly project. The cost is less than $25. Check it out.

Join Me and become privy to everything Stampin' Up! Receive a discount on all of your personal orders. Personally, I love SALES!

Please share, like, pin, tweet, or comment. Do not forget to FOLLOW and SUBSCRIBE to my blog.

HAPPY STAMPING!

Wednesday, October 19, 2022

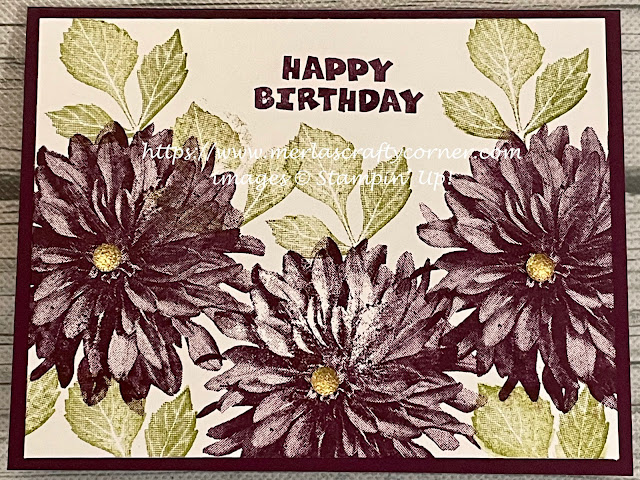
Grand Birthday

 This DisINKtive stamp set looks fabulous in any color. Still, the bolder, more vibrant hues manage to highlight the distINKtive opacities in the stamped images best. Thoughts? 


Stamps:
   Delicate Dahlias
   A Grand Kid

Paper:
   Blackberry Bliss A-2
   Basic White 5-1/4 x 4 (2)

Ink:
   Blackberry Bliss
   Old Olive

Technique:
   CAS

Accessories:
   Gold Faceted Gems
   Adhesive

First, I stamped three dahlias, using Blackberry Bliss ink, on a Basic White panel.

I then stamped the sentiment on the top center of the panel, using the same ink.

Next, I added leaves with Old Olive to fill in the white spaces.

I then adhered the panel to the Blackberry Bliss card front.

Lastly, I added three Gold Faceted Gems to the centers of the dahlias and adhered the other Basic White panel to the inside of the card.

Thank you for stopping to take a peek. Contact Me if you have any questions.

Click on Shop Now and browse through all things Stampin' Up! Start your wish list or order your favorites today. I included a HOST CODE for you to use if you like. Use it only if your product total is less than $150. You can find it in the right sidebar.

Join Me and get the best bang for your buck.

Do you want everything at your fingertips without having to look for it? Subscribe to Paper Pumpkin. Want more choices? Check out the Kits Collection.

One last thing, share, like, pin, tweet, or comment. Don't forget to FOLLOW and SUBSCRIBE to my blog. Okay, that was more than one thing.

HAPPY STAMPING!

Tuesday, October 18, 2022

Golden Birthday Numbers

This sentiment is sure to bring a smile to any face, especially to the one who is definitely having to do the math to remember just how many years they are celebrating. Thoughts? 


Stamps:
   Lighthearted Lines

Paper:
   Lovely Lipstick A-2
   Broadway Bound DSP 5-1/4 x 4
   Basic White 3-1/2 x 1-5/8, 5-1/4 x 4 (Inside)

Ink:
   Lovely Lipstick

Technique:
   Punching

Accessories:
   Corner Rounder Punch
   Metallic Pearls
   Adhesive

First, I cut the Broadway Bound Designer Series Paper to size and adhered it to the Lovely Lipstick card front.

I then stamped the Basic White 3-1/2 x 1-5/8 inch panel with the Lighthearted sentiment. I used Lovely Lipstick ink.

Next, I rounded the corners, using the corner rounder punch. I attached it to the center of the card front, using dimensionals.

Lastly, I added a few Metallic Pearls and adhered the Basic White panel to the inside of the card.

Thank you so much for stopping by here and taking a quick look-see. If you have any questions or need my assistance, Contact Me.

Shop Now and take a look at all of our new products and current promotions. Please use the HOST CODE sitting in the right sidebar if you did not earn your own rewards.

If you want to craft, but keep your costs below $25 a month, check out Paper Pumpkin. It just might be what you are looking for at the moment.

Join Me and become the newest member of my team. Remember there are no hidden agendas or penalties for giving it a go. Don't pass this opportunity to save.

You've come this far, so please share, like, pin, tweet, or comment. I appreciate your time and efforts. Let me know your thoughts and leave all of your questions behind. Do not forget to FOLLOW and SUBSCRIBE to my blog.

HAPPY STAMPING!

Monday, October 17, 2022

Birthday Ruffles

Adding ink to an embossing folder can give you some surprising results. Thoughts? 


Stamps:
   A Grand Kid

Paper:
   Pool Party A-2
   Basic White 5-1/4 x 4 (2), 2-1/2 x 1-1/4

Ink:
   Petal Pink
   Pool Party
   Real Red

Technique:
   Dry Embossing
   Sponging
   Die Cutting

Accessories:
   Cascading Ruffles 3D Embossing Folder
   Stitched Rectangles Framelits
   Pool Party Baker's Twine 36"
   Frosted Flower Embellishments
   Sponge
   Dimensionals
   Adhesive

First, I added Petal Pink to the inside of the Cascading Ruffles embossing folder. I gently placed my Basic White panel inside, making sure it did not move. I ran it through the dry embossing machine and set it aside. I then rinsed the embossing folder and dried it.

Next, I stamped and die cut my sentiment, using Real Red ink and the Stitched Rectangles Framelits.

I then sponged the edges with a bit of Pool Party.

I took 36 inches of Baker's twine from my stash and wrapped it around the embossed panel. I tied it off with a bow. I fanned out the strands of twine for a bit of a different look.

Next, I adhered the panel to the Pool Party card front and attached the sentiment using dimensionals.

Lastly, I added a Frosted Flower embellishment to the sentiment and adhered the other Basic White panel to the inside of the card.

Thank you immensely for your time. I know how precious it can be. Please Contact Me if you need anything Stampin' Up! or if you have any questions.

Click on Shop Now and take a look at some quality products. Investing in your craft is a no-brainer. I have included a HOST CODE for those of you who enjoy ordering only one or two items. It is located in the right sidebar. Of course, if your product total is more than $150, enjoy your rewards.

Of course, the best value for your dollar is joining the Stampin' Up! family. Just click on Join Me and check out the benefits.

Let's not forget Paper Pumpkin. If you want to craft on the go, or you like to keep things small and low-key, check it out. The kit includes all you need.

Please take a minute or two to share, like, pin, tweet, or comment. Don't forget to FOLLOW and SUBSCRIBE to my blog.

HAPPY STAMPING!

Sunday, October 16, 2022

Floral Sprinkles

Pigment sprinkles react with water. So, a unique background is created each time they are used. Here is a bright and colorful one. What do you think? 


Stamps:
   None

Paper:
   Granny Apple Green A-2
   Irresistibly Floral DSP 5-1/4 x 4
   Basic White 5-1/4 x 4 (Inside)

Ink:
   None

Pigment Sprinkles:
   Daffodil Delight
   Granny Apple Green
   Melon Mambo

Technique:
   Watercolor
   Emboss Resist

Accessories:
   Clear Faceted Gems
   Pop-Up Stickers
   Adhesive

First, I cut my Irresistibly Floral DSP to size. This paper is embossed with a glossy white finish. It is perfect to use with any watercolor, sponging, or coloring technique.

I sprinkled the colors lightly on the panel and then misted it with water. I dabbed at the places that accumulated excess water or color. 

Note, you do not want to add too many sprinkles or mix too many colors because it will only give you a muddy look. I was rather pleased with my result.

I set the panel aside to dry. I did speed the process up a bit by using a heating tool. You do have to be careful not to burn your panel.

Once the panel dried, I adhered it to the Granny Apple Green card front.

Lastly, I added a few embellishments and adhered the Basic White panel to the inside of the card.

Thank you so much for dropping by here. Contact Me if you have any questions. 

Click on all of the tabs above and explore products, promotions, and opportunities.

Please take the time to share, like, pin, tweet, or comment. Do not forget to FOLLOW and SUBSCRIBE to my blog.

HAPPY STAMPING!

Saturday, October 15, 2022

Birthday Mist

This is a simple layout to use for any occasion. Simply, switch your sentiment to suit your needs. What do you think? 


Stamps:
   Peaceful Moments

Paper:
   Misty Moonlight A-2
   Pale Papaya 1 x 4, 2-1/4 x 5-1/2
   Hand-Penned DSP 2 x 5-1/2
   Basic White 2-1/2 x 1-1/4, 5-1/4 x 4 (Inside)

Ink:
   Misty Moonlight

Technique:
   CAS
   Punching

Accessories:
   2021-2023 In-Color Jewels
   Banners Pick a Punch
   Dimensionals
   Adhesive

First, I cut the DSP to size and adhered it to a Pale Papaya matte.

I then adhered this panel to the center of my Misty Moonlight card front. 

Next, I stamped the sentiment on a 2-1/2 x 1-1/4 Basic White scrap. I cut the sides to match the Pale Papaya banner underneath.

I then took the 1 x 4 Pale Papaya strip and punched the sides, using the Banners Pick a Punch. 

I adhered the sentiment onto this banner and attached it to the card front, using dimensionals.

Lastly, I added a few In-Color Jewels and adhered the Basic White panel to the inside of the card.

Thank you so very much for taking the time to stop and glance at my work. If you have any questions or suggestions, please Contact Me. I do appreciate your time.

If you need any supplies, or you are curious to know just how much these products cost, click on Shop Now and satisfy your curiosity. A HOST CODE is available for you to use in case you did not earn your own rewards. You can find it in the right sidebar.

Do you want the best value for your buck? Join Me and reap all of the rewards. I will be more than happy to assist you. Check it out and note that there are no hidden agendas.

Wait! Don't leave. If you just want to try it and see, then subscribe to Paper Pumpkin. You will receive a kit with everything you need to create a project. Check out the Kit Collection for more choices.

I would love for you to take a minute to share, like, pin, tweet, or comment. Please FOLLOW and SUBSCRIBE to my blog.  Let me know what you think below in the comments.

HAPPY STAMPING!

Friday, October 14, 2022

Peaceful Times

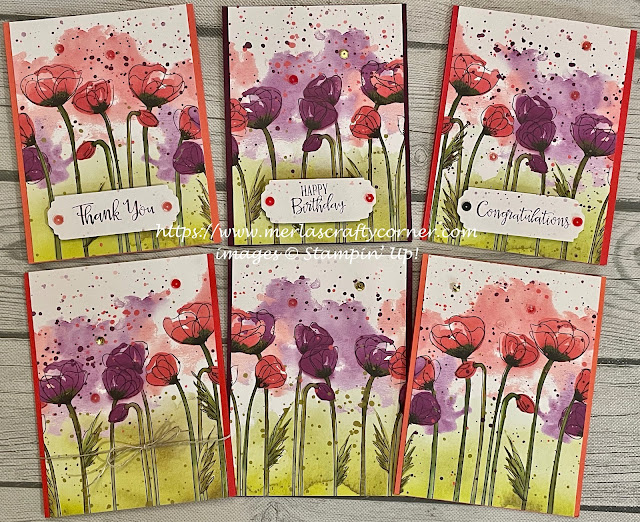
When you have a sheet of 12 x 12 designer paper that is too beautiful to cut, grit your teeth and make at least six cards, using the whole sheet. What do you think of these? 


Stamps:
   Peaceful Moments

Paper:
   Blackberry Bliss A-2 (2)
   Calypso Coral A-2 (2)
   Poppy Parade A-2 (2)
   Peaceful Poppies DSP 5-1/2 x 4 (6), 1 x 3-1/4 (3)
   Basic White 5-1/4 x 4 (6) 

Ink:
   Blackberry Bliss

Technique:
   CAS
   Punching
   OSW 12 X 12

Accessories:
   Lovely Labels Pick a Punch
   Peaceful Poppies Sequins
   Dimensionals
   Micro Glue Dots
   Adhesive

First, holding the DSP right side up, I cut it at 4" twice, giving me three 12 x 12 strips.

I then cut each panel at 5-1/2, measuring from the green stems upward. This gave me six panels and left me with three small white speckled strips to use for 3 sentiments. I cut these a tiny bit more to make sure they measured 1" in width to fit the punch.

Next, I adhered each of the panels to a card front.

I then stamped a sentiment on each of the three strips and punched the ends, using the Lovely Labels pick a punch. I attached them with dimensionals.

Lastly, I added a few sequins to the card fronts and adhered a Basic White panel to the inside of each card.

Thank you for visiting. I do love company. Feel free to Contact Me if you have any questions.

Explore current products, promotions, and all of the opportunities. Just click on Shop Now. A HOST CODE is available in the right sidebar for those of you who do not earn your own rewards.

For those of you who like kits with everything you need to complete a project, we offer Paper Pumpkin. Your monthly cost is less than $25. Also, you might want to look at the new Kits Collection!

Join Me and become my newest team member. I look forward to meeting you.

Please take a minute to share, like, pin, tweet, or comment. Do not forget to FOLLOW and SUBSCRIBE to my blog.

HAPPY STAMPING!

Thursday, October 13, 2022

Birthday Cookies

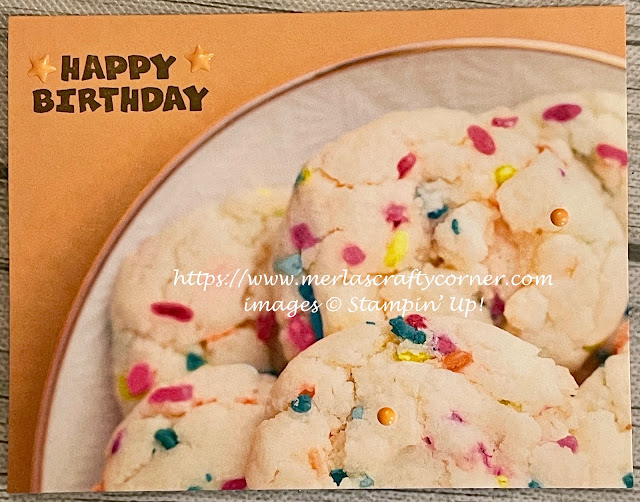
It is never a party until you serve something sweet to eat. The go to item is always a cake, but I enjoy the smaller treats like cookies and candy. Here is a card showing a plate of cookies with plenty of sprinkles on top. What do you think? 


Stamps:
   A Grand Kid

Paper:
   Peekaboo Peach A-2
   Picture Perfect Party DSP 5-1/2 x 4-1/4
   Basic White 5-1/4 x 4 (Inside)

Ink:
   Tuxedo Black Memento

Technique:
   CAS

Accessories:
   2016-2018 In-Color Enamel Shapes
   Adhesive

First, I cut the designer series paper to cover the entire card front.

I stamped the sentiment in the top right-hand corner, using Tuxedo Black Memento.

Next, I adhered the panel to the card front.

Lastly, I added a few enamel shapes and adhered the Basic White panel to the inside of the card.

When you have Picture Perfect Party DSP, the work is done for you.

I am so excited that you stopped to read and check out my work. Thank you from the bottom of my heart. Contact Me and let me know if there is anything I can answer for you.

Do you have some time to browse? You do not want to pass up the opportunity to shop some quality products and see what is trending. Shop Now and take a peek. If you decide to place an order, I have included a HOST CODE in the right sidebar if you do not earn any rewards on your own. Thanks in advance.

Are you undecided? Subscribe to Paper Pumpkin and give it a go. Let the products speak for themselves. The cost is less than $25 and you are completely in control. No small print for you to miss. Try it.

Join Me and gain the best value for your hard-earned money. Check it out now.

Share, like, pin, tweet, or comment. Come on, I dare you. Don't forget to FOLLOW and SUBSCRIBE to my blog.

HAPPY STAMPING!

Wednesday, October 12, 2022

Splashy Thank You

Stamp your own background using the Nature's Prints stamp set. What do you think? 


Stamps:
   Nature's Prints

Paper:
   Gray Granite A-2
   Basic White 5-1/4 x 4 (2)
   Sun Prints DSP 3/4 x 4

Ink:
   Cajun Craze
   Mossy Meadow
   Pool Party

Technique:
   CAS

Accessories:
   White Twine 36" 
   Rhinestone Basic Jewels
   Adhesive

First, I stamped my sentiment, using Mossy Meadow ink on a Basic White panel.

I then stamped the large leaves, using Cajun Craze.

Next, I stamped the ferns with Mossy Meadow.

I then added the smaller images with Cajun Craze.

Next, I used Pool Party to fill in the white with some splashes.

I then adhered the strip of Sun Prints designer series paper across the panel.

I wrapped the white twine around it three times and tied a bow. I spread the threads out on each end.

Next, I adhered the panel to the Gray Granite card front.

Lastly, I added a few rhinestones and adhered the other Basic White panel to the inside of the card.

Note that the strip of DSP and the white twine are both left-over from other projects. The twine is from a Paper Pumpkin kit and the DSP is a left-over strip from the Nature's Thank You card. Always hang on to the bits that are not immediately used. They do come in handy!

Thank you so much for spending time with me here. Contact Me if you have any questions.

Shop Now and take a look at all of our new products and current promotions. Please use the HOST CODE sitting in the right sidebar if you did not earn your own rewards. You can click HERE to see the list and prices of items. 

Subscribe to Paper Pumpkin and keep your monthly cost below $25! Join Me and become my newest team member.

Either way, please share, like, pin, tweet, or comment. Do not forget to FOLLOW and SUBSCRIBE to my blog.

HAPPY STAMPING!

Wednesday, October 5, 2022

Nature's Thank You

I chose to let the designer series paper adorn the card front. The sentiment can be placed anywhere on the card front. What do you think? 


Stamps:
   Nature's Prints

Paper:
   Pacific Point A-2
   Sun Prints DSP 5-1/4 x 4
   Basic White 2-1-1/2, 5-1/4 x 4 (Inside)

Ink:
   Pacific Point

Technique:
   Die Cutting
   Sponging

Accessories:
   Stitched Rectangles Framelits
   Sponge
   Brights Candy Dots
   Rhinestone Basic Jewels
   Glitter White Ribbon - 6"
   Stampin' Seal+
   Dimensionals
   Adhesive

First, I stamped and die cut my sentiment. I sponged the edges using Pacific Point ink.

I then used Stampin' Seal+ on the back of the Sun Prints DSP panel to attach the Glitter White ribbon.

Next, I adhered the panel to the Pacific Point card front.

I added the sentiment using dimensionals.

I added a couple of Candy Dots to the sentiment and a few rhinestones to the card front.

Lastly, I adhered a Basic White panel to the inside of the card.

Thank you so much for spending time with me here. Contact Me if you have any questions.

Shop Now and take a look at all of our new products and current promotions. Please use the HOST CODE sitting in the right sidebar if you did not earn your own rewards.

Subscribe to Paper Pumpkin and keep your monthly cost below $25! Join Me and become my newest team member.

Either way, please share, like, pin, tweet, or comment. Do not forget to FOLLOW and SUBSCRIBE to my blog.

HAPPY STAMPING!