Showing posts with label Blessed by God. Show all posts

Sunday, November 10, 2024

A Blessing

There is always someone extra special that deserves to be recognized and appreciated for something out of the ordinary. This is the card for them. Thoughts? 


Stamps:
   Blessed by God
   Kinda Eclectic

Paper:
   Hello Honey A-2
   Blackberry Bliss DSP 5-1/4 x 4
   Basic White 4 x 3-3/4, 1-1/2 x 2-1/2, 5-1/4 x 4 (Inside)

Ink:
   Blackberry Bliss
   Hello Honey

Technique:
   Die Cutting
   Punching
   Sponging

Accessories:
   Extra-Large Oval Punch
   Deco Labels Collection
   Ribbon 5-1/2"
   Gold Wink of Stella Glitter Brush
   Sponge
   Dimensionals
   Adhesive

First, I stamped the sun from the Kinda Eclectic stamp set, using Hello Honey. I did go over the rays with a Hello Honey marker to accent them more. This is optional.

I then stamped a solid cross over it, using Blackberry Bliss ink.

Next, I die cut the panel, using the Deco Labels Collection dies, and sponged the edges with Blackberry Bliss.

I then stamped, punched, and sponged the sentiment, using Blackberry Bliss ink and the Extra-Large Oval Punch.

Next, I adhered a ribbon across the bottom of the Blackberry Bliss DSP. I secured the ends of the ribbon on the back of the panel.

I then adhered the Blackberry Bliss DSP panel onto the Hello Honey card front.

Next, I attached the image and the sentiment to the card front, using dimensionals.

Lastly, I added a Basic White panel to the inside of the card.

Thank you so much for giving me a bit of your time. Please Contact Me if I can return the favor.

Check out all of the options by clicking on the headers above.

Do not forget to FOLLOW and SUBSCRIBE to my blog. Please share, like, pin, tweet, or comment. I look forward to reading your thoughts and possible ideas for improvements. 

HAPPY STAMPING!

Thursday, July 20, 2023

Pearly Red Heart

Create your own background by dry embossing a panel of aluminum foil. It is so easy and looks amazing! What do you think? 


Stamps:
   Blessed by God

Paper:
   Real Red A-2, 3" Sq.
   Basic White 5-1/4 x 4 (2)
   Aluminum Foil 5-1/2 x 4-1/4 (must cover the entire Basic White panel)

Ink:
   Archival Basic Black

Technique:
   Die Cutting
   Dry Embossing

Accessories:
   Embossing Folder
   Hearts a Flutter Dies
   Basic Pearl Jewels
   Aluminum Foil
   Adhesive

First, I covered a Basic White panel with aluminum foil. You can secure it on the back with tape if you want. I just folded mine over and it held just fine.

I then placed it inside an embossing folder and ran it through the embossing machine. I chose a folder that had birds and vines on it. You can choose any design you like for your background.

I then adhered it to the Real Red card front.

Next, I stamped and die cut a heart, using the Hearts a Flutter Dies. I attached it with adhesive, but you may choose to add dimensionals or leave it flat.

Lastly, I added some pearls and adhered the other Basic White panel to the inside of the card.

Thank you for being here and taking the time to look at my blog entry. Contact Me if you need anything related to Stampin' Up!

If you would like to Shop Now, you can check out all that is new, current, and on-sale! I have included a HOST CODE in the right sidebar, if you would like to use it.

Notice that we offer a monthly subscription called Paper Pumpkin. Check it out and see if it is for you. The Kits Collection also offers a variety of kits at varying prices.

In order to get the most value for your dollar, you will want to Join Me and become part of my team. Click on the link and see if you are interested.

I would love for you to take a few minutes and share, like, pin, tweet, or comment. Don't forget to FOLLOW and SUBSCRIBE to my blog.

HAPPY STAMPING!

Tuesday, June 13, 2023

Manly Baptism

Check out this oval on its side. I like it. What do you think? 


Stamps:
   Blessed by God

Paper:
   Soft Succulent A-2, 3 x 2-1/4 Oval
   Basic Black 5-3/8 x 4-1/8
   Texture Chic DSP 5-1/4 x 4
   Basic White 5-1/4 x 4 (Inside)
   Gold Paper Scrap

Ink:
   Tuxedo Black Memento

Technique:
   Die Cutting

Accessories:
   Cross of Hope Framelits
   Framed Florets Dies
   Black Rhinestone Jewels
   Dimensionals
   Adhesive

First, I grabbed a Soft Succulent oval that I had in my stash of left-overs. It was left-over from a Framed Florets Die that I had cut for another card. This is the center of the frame. 

I then stamped the sentiment on the left side of the oval, using Tuxedo Black Memento.

I added a gold cross on the right of the sentiment. The cross was die cut, using the Cross of Hope Framelits. When I have small pieces of Metallic paper, I die cut or punch basic images like crosses, hearts, stars, and flowers. I keep them to use when I need a small embellishment. The cross was perfect in this case.

FYI: When the metallic piece is too small, I punch small circles to use in shaker cards. I know, I don't like to throw anything away...but I do find use for all my scraps!

Next, I adhered the DSP panel onto the Basic Black matte, and then onto the Soft Succulent card base.

I attached the oval, using dimensionals, in the center of the card.

Lastly, I added three Black Rhinestone Jewels and adhered the Basic White panel to the inside of the card.

Thank you for taking the time to read this. I try my best to keep it short and sweet. Contact Me if you have questions or need anything Stampin' Up!

Shop Now and take a peek at quality products. There is a HOST CODE if your product total is less than $150. You do not have to use it, but I would appreciate it. It is located in the right sidebar.

Join Me and become part of my team. I will be as involved as you like. Check out the advantages.

Are you curious, but undecided? Subscribe to Paper Pumpkin and try it. The kit will include everything you need, and it won't break the bank. Check out the Kit Collection for more all-inclusive kit choices.

Please share, like, pin, tweet, or comment. I would love for you to FOLLOW and SUBSCRIBE to my blog.

HAPPY STAMPING!

Friday, September 23, 2022

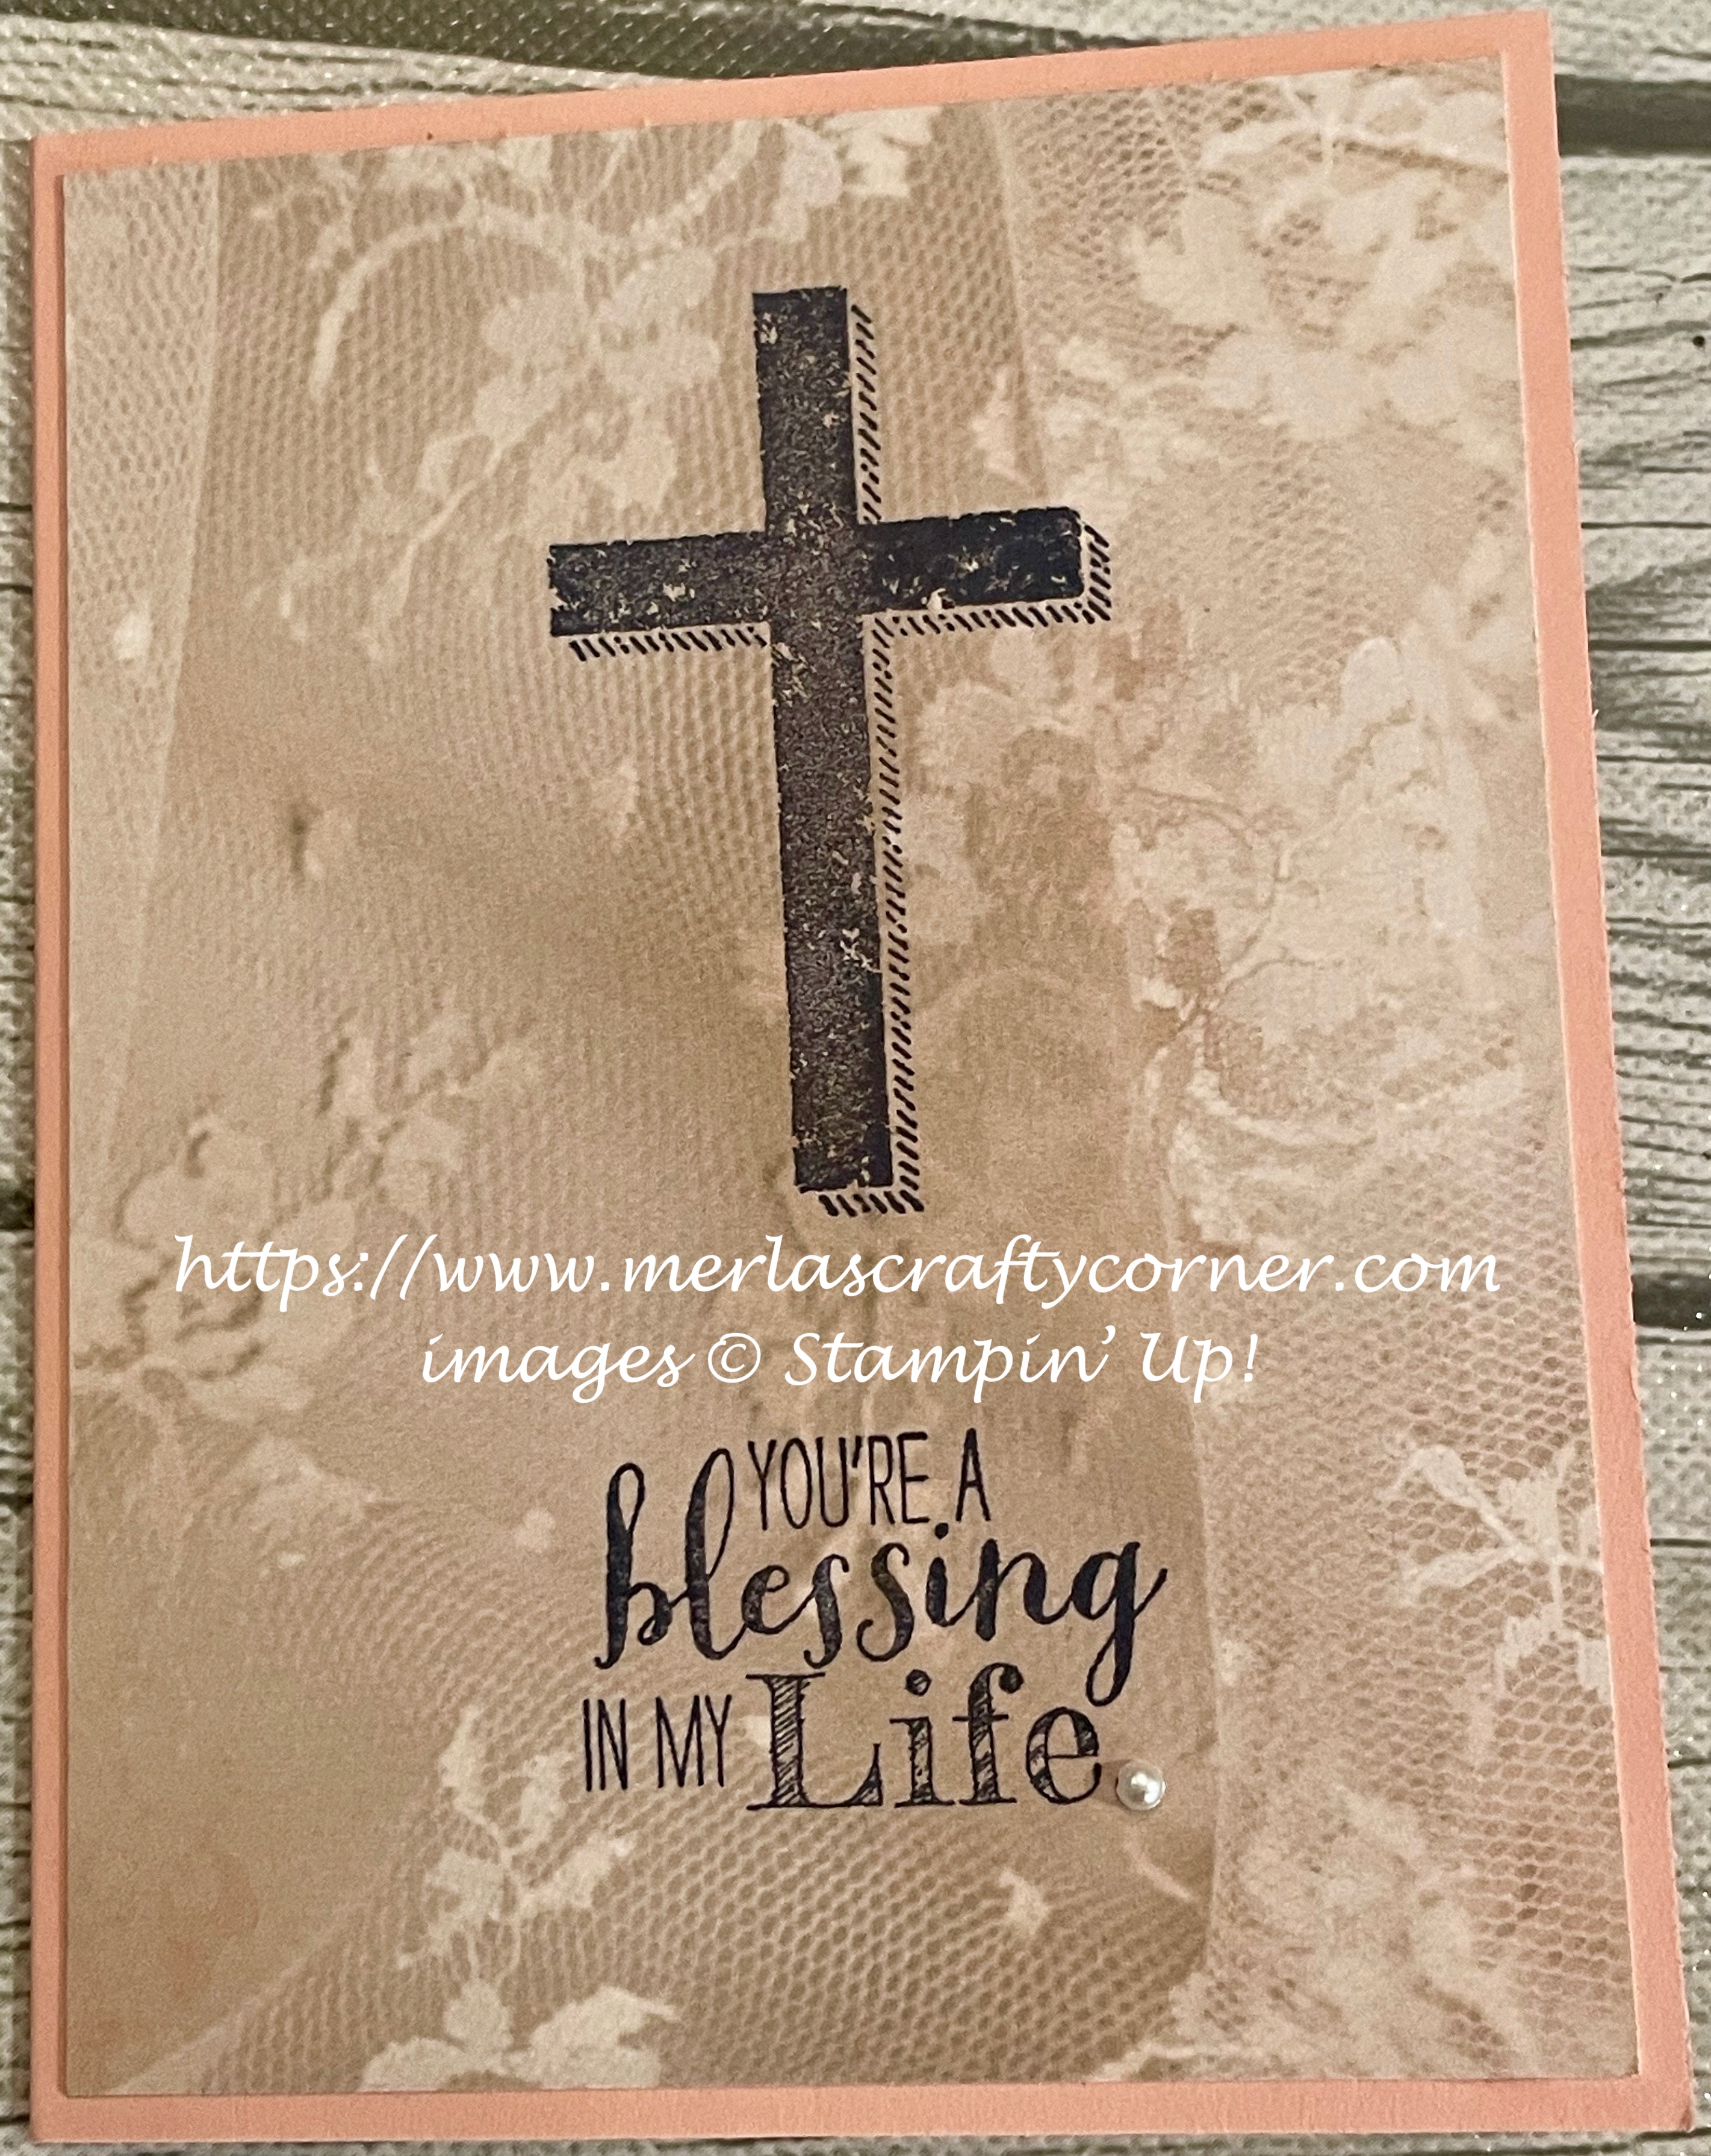
Flowery Lace

Let those deserving individuals know how much you appreciate who they are and what they do. Don't forget about those who volunteer their time and energy to help others in need. Thoughts? 


Stamps:
   Blessed by God

Paper:
   Blushing Bride A-2
   Falling in Love DSP 5-1/4 x 4
   Basic White 5-1/4 x 4 (Inside)

Ink:
   Night of Navy

Technique:
   CAS

Accessories:
   Pearl Basic Jewels
   Adhesive

First, I stamped the cross directly onto the Falling in Love DSP panel, using Night of Navy ink.

I then stamped the sentiment below it, using Night of Navy ink.

Next, I adhered the DSP panel onto the Blushing Bride card front.

Lastly, I added a pearl at the end of the sentiment and adhered the Basic White panel to the inside of the card.

Thank you for visiting. I do love company. Feel free to Contact Me if you have any questions.

Explore current products, promotions, and all of the opportunities. Just click on Shop Now. A HOST CODE is available in the right sidebar for those of you who do not earn your own rewards.

For those of you who like kits with everything you need to complete a project, we offer Paper Pumpkin. Your monthly cost is less than $25. Also, you might want to look at the new Kits Collection!

Join Me and become my newest team member. I look forward to meeting you.

Please take a minute to share, like, pin, tweet, or comment. Do not forget to FOLLOW and SUBSCRIBE to my blog.

HAPPY STAMPING!

Sunday, November 7, 2021

Heavenly Marriage

Here is a simple, yet elegant wedding or anniversary card. This will take less than ten minutes of your time to create. Plus, it is easy to change the look simply by switching out the background paper. What do you think? 


Stamps:
   Blessed by God

Paper:
   Cajun Craze A-2
   Basic Black 5-1/4 x 4 
   Adventure Bound DSP 5 x 3-3/4
   Whisper White 5-1/4 x 4 (Inside)

Ink:
   Archival Basic Black
   Cajun Craze

Technique:
   Distressed Edges

Accessories:
   Distressing Tool
   Adhesive

First, I cut my panel of designer series paper.

I then stamped the sentiment in the lower-right corner, using Archival Basic Black ink.

I stamped the cross in the upper-center of the panel, using Cajun Craze.

Next, I distressed the edges of the panel with my distressing tool. If you do not have one, you can use your paper snips to rough up the DSP edges.

I then adhered this panel to a Basic Black matte and then onto the Cajun Craze card front.

Lastly, I adhered a Whisper White panel to the inside of the card.

Thank you so much for dropping by here. Contact Me if you have any questions.

Click on all of the tabs above and explore products, promotions, and opportunities.

Please take the time to share, like, pin, tweet, or comment. Do not forget to FOLLOW and SUBSCRIBE to my blog.

HAPPY STAMPING!

Wednesday, July 22, 2020

37th Anniversary

Here is a simple layout that can be used for someone celebrating an anniversary in their religious life. What do you think?


Stamps:
   Blessed By God
   Timeless Textures
   Number of Years

Paper:
   Tempting Turquoise A-2
   Whisper White Scraps

Ink:
   Tuxedo Black Memento
   Tempting Turquoise

Technique:
   Die Cutting

Accessories:
   Large Numbers Framelits Dies
   Stacked with Love Washi Tape
   Glitter Tape
   Dimensionals

I stamped the top and bottom of the card with a stamp from the Timeless Textures stamp set.

Next, I stamped and die cut the numbers, cross, and tag.

I then added the washi tape directly onto the card base.

I added all of the die cuts using dimensionals and stamped the th.

Thank you so very much for taking an interest in my card. Contact Me if you have any questions or need my assistance.

I recommend that you take a bit of time to check out each of the buttons above and take advantage of our current offerings.

Please use the HOSTESS CODE provided in the sidebar if you order less than $150. 

Please share, like, pin, tweet, and comment on my blog. Do not forget to FOLLOW and SUBSCRIBE to my blog.

HAPPY STAMPING!