Showing posts with label Hold on to Hope. Show all posts

Tuesday, May 30, 2023

Celebrating You

This is such a wonderful way to say happy birthday, congratulations, love you, or just to let someone know how wonderful they are. This is truly unexpected, but so true. Thoughts? 


Stamps:
   Hold on to Hope

Paper:
   Petal Pink A-2, 3-3/4 x 2-3/4
   Basic Black 5-3/8 x 4-1/8
   Magnolia Lane DSP 5-1/4 x 4
   Basic White 3-1/2 x 2-1/2, 5-1/4 x 4 (Inside)
   Gold Foil Scraps

Ink:
   Petal Pink
   Mossy Meadow

Technique:
   Layering
   Punching

Accessories:
   Itty Bitty Accents Punch Pack
   Glue Dots
   Dimensionals
   Adhesive

First, I stamped the silhouette of the cross in the center of the 3-1/2 x 2-1/2 Basic White panel, using Petal Pink ink.

I then stamped my sentiment over the cross, using Mossy Meadow.

Next, I adhered this panel onto a Petal Pink matte.

Using the Itty Bitty Accents heart-shaped punch, I punched a heart from a piece of gold scrap paper. I adhered this to the bottom right corner of the image panel with a glue dot.

I then adhered the DSP panel onto a Basic Black matte and then onto the Petal Pink card front.

I added the image panel to the center of the card front, using dimensionals.

Lastly, I added the Basic White panel to the inside of the card.

Thank you for taking a peek. Please Contact Me for further information on Stampin' Up! or if you have questions.

Shop Now and browse our current products and promotions. There is a HOST CODE located in the right sidebar if your order is less than $150. Of course, you do not have to use it, but I would appreciate it.

Do you have the crafting bug? Subscribe to Paper Pumpkin and receive a monthly dose. The cost is less than $25 and you can take it, skip it, or stop it. I must warn you. It can be addictive! I can't seem to stop!

Join Me and become a member of my team. Check out the benefits and gain the best value for your money.

Don't forget to share, like, pin, tweet, or comment. Make sure to FOLLOW and SUBSCRIBE to my blog.

HAPPY STAMPING!

Saturday, September 24, 2022

Above the Mountains

This is one of those cards that looks so much better in real life. The background was created using a bit of alcohol and ink, so each turned out to be quite unique. I made four of them, but they all used the same supplies. What do you think? 


Above the Mountains


Above the Mountains Too


Above the Mountains Tre


Above the Mountains Quad


Stamps:
   Hold on to Hope

Paper:
   Crushed Curry A-2
   Basic Black 5-3/8 x 4-1/8, 2-1/4 x 4 
   Glossy white 5-1/4 x 4
   Galvanized Metallic Paper 2 x 3
   Wood Textures DSP 2 x 3
   Basic White 5-1/4 x 4 (Inside)

Ink:
   StazOn Jet Black

Re-Inkers:
   Real Red
   Pumpkin Pie
   Crushed Curry

Technique:
   Polished Stone

Accessories:
   Cross of Hope Framelits
   Fine Tip Glue Pen
   Dimensionals
   Adhesive
   Stamparatus/MISTI

First, I created my background using the Polished Stone Technique found on SCS. Click HERE for instructions. I did not use a sealer on mine.

Once the background was dry, I adhered the Basic Black to the bottom of the panel. I took the Basic Black piece and tore it to give the illusion of mountains in the distance. I placed one half on one card and the other half on another card.

I then die cut the solid cross on a piece of Wood Textures DSP, and the more intricate cross on a piece of Galvanized Metallic Paper. I adhered the crosses together, using a Fine Tip Glue Pen.

Next, I adhered the glossy panel to the Basic Black matte. This helped to keep it flat. 

I then placed it into my Stamparatus and stamped the sentiment. I did have to stamp the sentiment twice to get it nice and dark. The last card moved a tad without my noticing, but I think it looks like shadow stamping. It makes this one VERY unique.

Next, I adhered the panel to the card front and added the cross, using dimensionals.

Lastly, I adhered a Basic White panel to the inside of the card.

Thank you so much for stopping by here. Contact Me if you have any questions.

Shop Now and buy your supplies to make your own cards. Place an order today for your favorites before they run out of stock.

Join Me and become my new team member. Enjoy the best savings and opportunity offered today!

Subscribe to Paper Pumpkin and craft monthly for under $25. Don't forget to take a look at the All-Inclusive Kits!

If you liked my card, please share, like, pin, tweet, or comment. I would love for you to FOLLOW and SUBSCRIBE to my blog. Let me know what you think in the comments below.

HAPPY STAMPING!

Tuesday, September 20, 2022

Petal Pink Cross

Sometimes we need a little reminder of who is in charge. We trust and rely on our support system, yet they may not be around 24/7. Still, we must  know that we are never truly alone. Thoughts? 


Stamps:
   Hold on to Hope

Paper:
   Basic White A-2, 2-1/2 x 3-1/2, Scrap, 5-1/4 x 4 (Inside)
   Early Espresso 5-3/8 x 4-1/8, 2-3/4 x 3-3/4
   Petal Pink 5-1/4 x 4

Ink:
   Early Espresso
   Petal Pink

Technique:
   Die Cutting

Accessories:
   Cross of Hope Framelits
   Pearl Basic Jewels
   Glue Dots
   Dimensionals
   Adhesive

First, I stamped the flowers around the edges of the Petal Pink panel, using Petal Pink ink. It is not necessary to stamp in the middle of the panel because it will be covered by the sentiment panel.

I then took the 2-1/2 x 3-1/2 Basic White panel and stamped the cross using Petal Pink ink.

Next, I stamped the sentiment directly onto it, using Early Espresso ink.

I then stamped and die cut a butterfly. I used Early Espresso ink and the Cross of Hope framelits.

Next, I adhered the layers together. I added the Petal Pink panel to the Early Expresso panel and then onto the card front.

I then adhered the stamped Basic White panel to the Early Espresso panel and attached it to the center of the card front using dimensionals.

Lastly, I attached the butterfly with a glue dot to the top right corner of the sentiment panel and adhered the Basic White panel to the inside of the card.

Thank you so much for stopping by here and taking a quick look-see. If you have any questions or need my assistance, Contact Me.

Shop Now and take a look at all of our new products and current promotions. Please use the HOST CODE sitting in the right sidebar if you did not earn your own rewards.

If you want to create, but keep your costs below $25 a month, check out Paper Pumpkin. It just might be what you are looking for at the moment.

Join Me and become the newest member of my team. Remember there are no hidden agendas or penalties for giving it a go. Don't pass this opportunity to save.

You've come this far, so please share, like, pin, tweet, or comment. I appreciate your time and efforts. Let me know your thoughts and leave all of your questions behind. Do not forget to FOLLOW and SUBSCRIBE to my blog.

HAPPY STAMPING!

Monday, September 19, 2022

God is Love

I used Brusho Crystal Colour on the following four cards. Since the crystals react with water, each card is unique. The general statement on the card front will be made more personal by the sender's message expressed inside. Thoughts?


God is Love


God is Love Too


God is Love Tre


God is Love Quad


Stamps:
   Hold on to Hope

Paper:
   Basic White or Dapper Denim A-2
   Basic Black 5-3/8 x 4-1/8
   Shimmery White 5-1/4 x 4
   Basic White 5-1/4 x 4 (Inside), 1-1/4 x 3-1/4
   Gold Foil 2 x 3

Ink:
   Tuxedo Black Memento

Brusho Crystal Colour:
   Prussian Blue
   Yellow

Technique:
   Die Cutting
   Brushos/Watercolor

Accessories:
   Cross of Hope Framelits
   Water Mister
   Glue Dots
   Dimensionals
   Adhesive

First, I sprinkled Prussian Blue Brusho Crystals on the outer edges of my Shimmery White panel and yellow in the center.

I then sprayed water on the panel, dabbing the excess with a paper towel. I added more crystals or water until I was happy with the panel. I set it off to the side to dry.

I then die cut my gold foil cross, using the Cross of Hope Framelits.

Next, I stamped and die cut the sentiment: God Is Love. I used Tuxedo Black Memento.

Once the brusho panel was dry, I adhered it to a Basic Black matte. I then adhered it to either a Basic White or Dapper Denim card front.

I added the gold foil cross using micro glue dots.

The sentiment was attached with dimensionals.

Lastly, I adhered the Basic White panel to the inside of the card.

Thank you so much for stopping by here and spending a few minutes of your day with me. I appreciate your time. Contact Me if you have any questions, need a demonstrator, or just want to stamp or share ideas.

Shop Now and enjoy browsing products and promotions. I have a HOST CODE in the right sidebar in case you did not earn your own rewards.

Do not miss the opportunity to Join Me and become the newest member of my team.

Paper Pumpkin should not be ignored. I enjoy putting my kit together monthly.

Take a few minutes and share, like, pin, tweet, or comment. I would love to see what you really think. Do not forget to FOLLOW and SUBSCRIBE to my blog.

HAPPY STAMPING!


Thursday, September 23, 2021

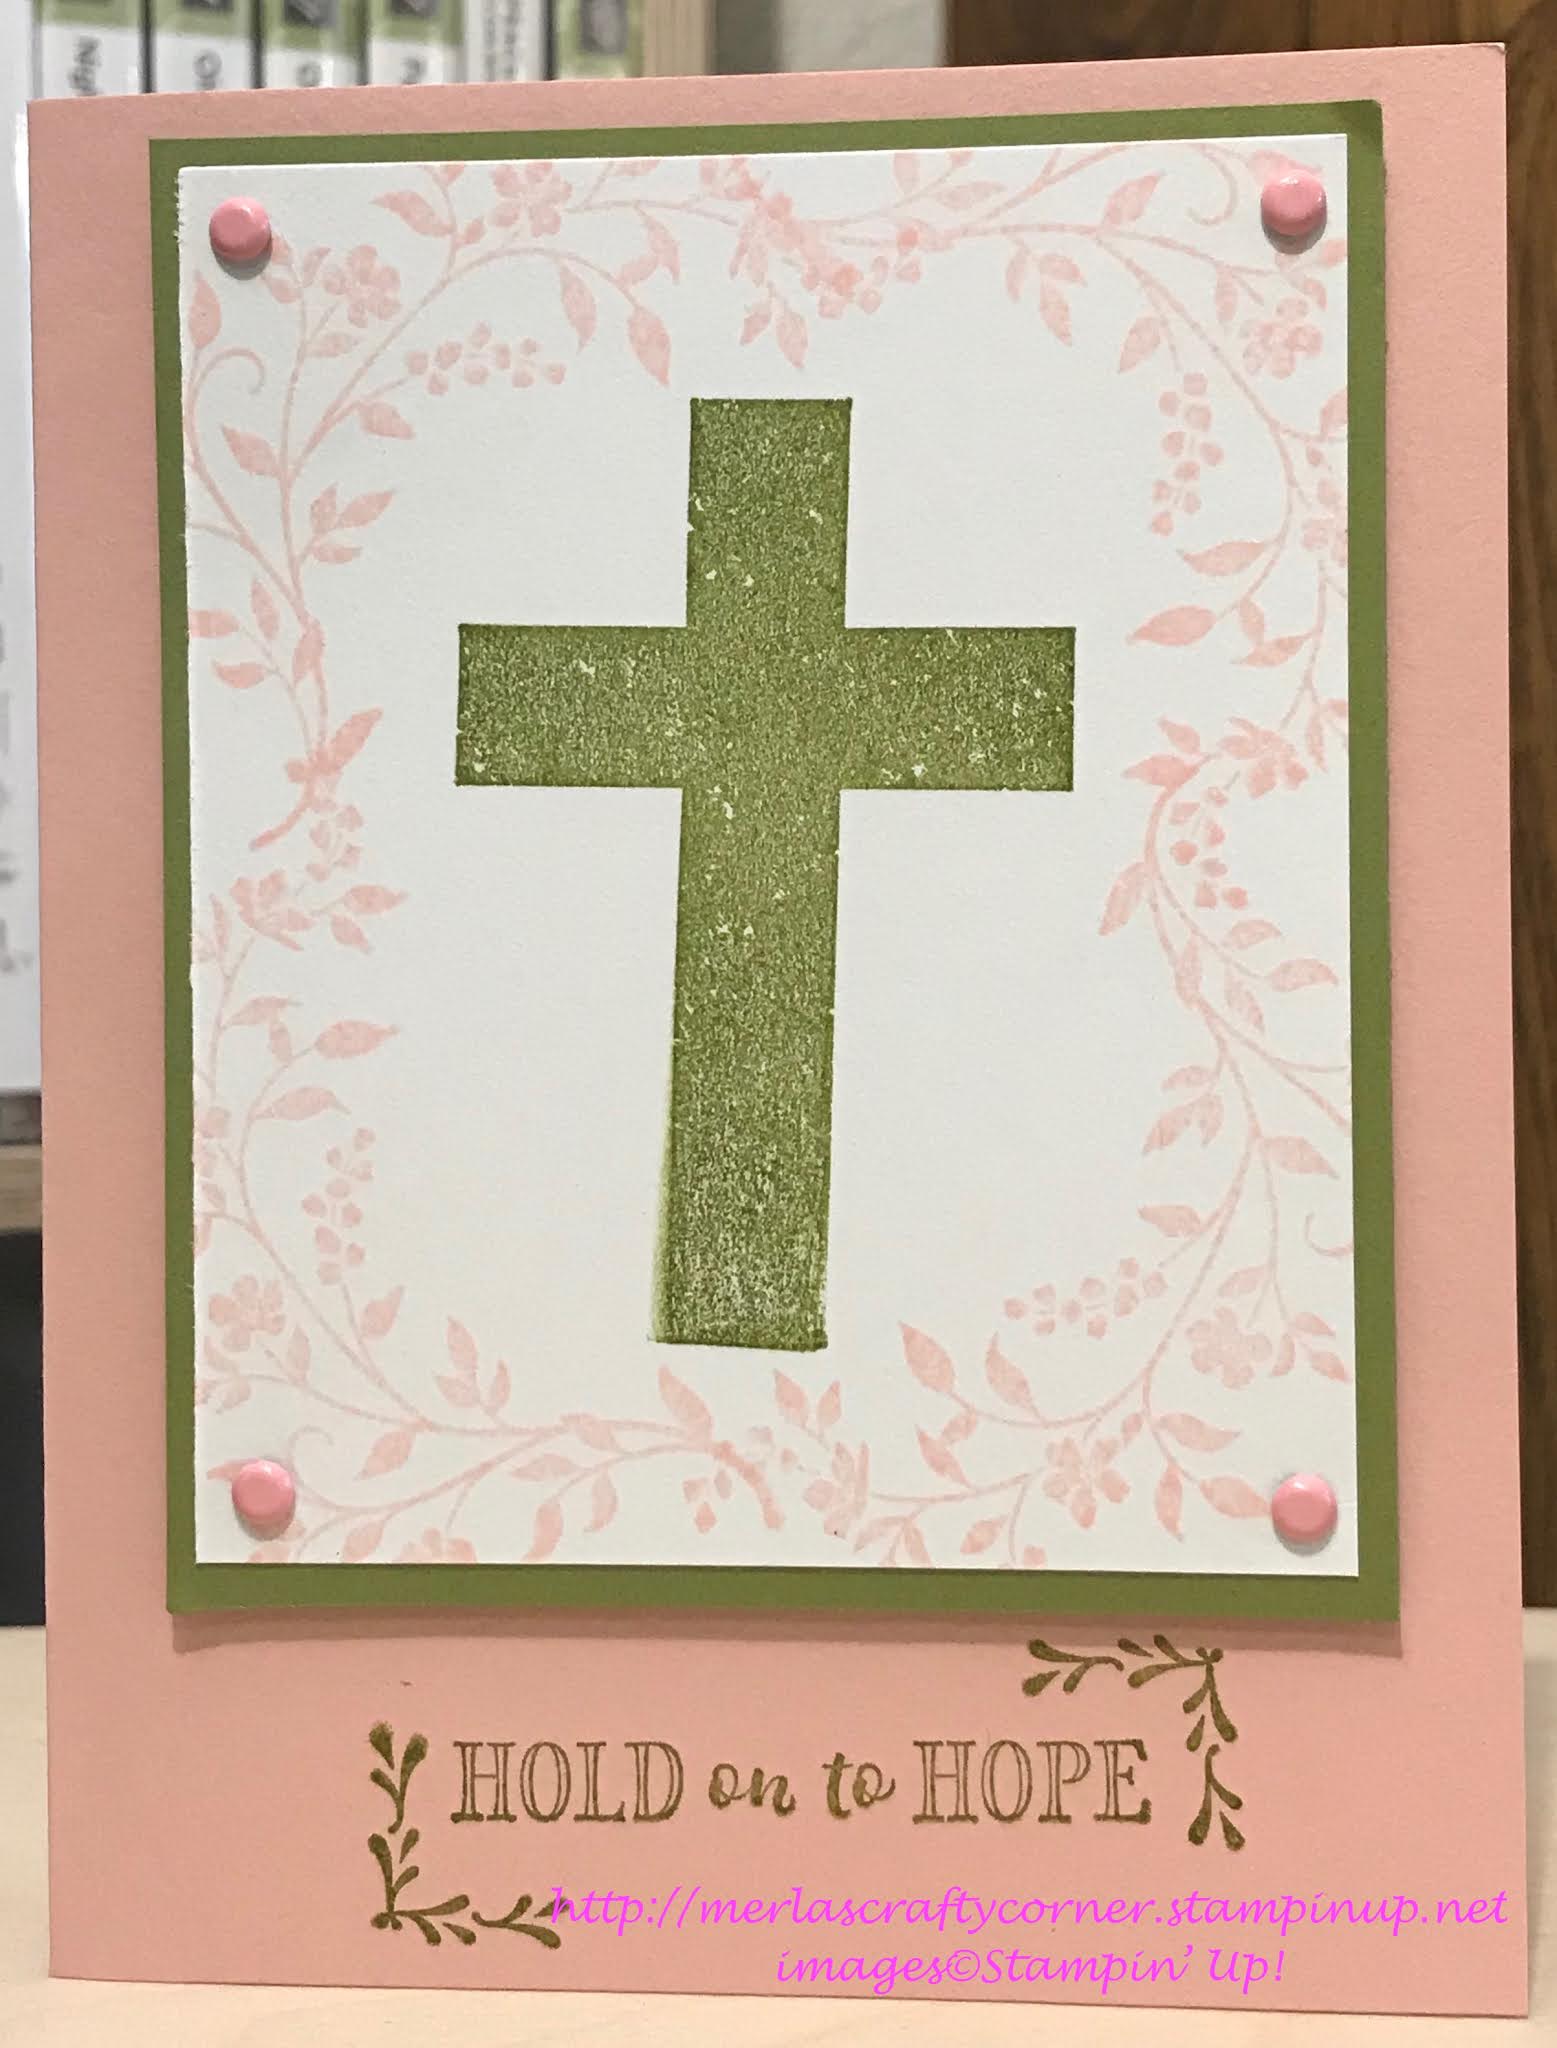
Hold on to Hope

Hope is a feeling of optimism. Although it is something you can lose, no one can take it from you. So, hold on to it! Thoughts?


Stamps:
   Hold on to Hope

Paper:
   Blushing Bride A-2
   Old Olive 3-1/2 x 4-1/4
   Basic White 3-1/4 x 4, 5-1/4 x 4 (Inside)

Ink:
   Blushing Bride
   Pink Pirouette
   Old Olive

Technique:
   Stamping

Accessories:
   Blushing Bride Brads
   Dimensionals
   Adhesive

I began with the small Basic White panel. I stamped the cross in the center using Old Olive ink.

I then stamped the foliage in each of the corners. I used Pink Pirouette.

Next, I adhered the Basic White panel onto the Old Olive panel.

I added a brad to each corner.

I attached this panel onto the Blushing Bride card front using dimensionals.

I then stamped the sentiment in the lower center of the card front. I used Old Olive ink. I added the leafy corner to each side of it.

Lastly, I adhered the other Basic White panel to the inside of the card using liquid adhesive.

Thank you so very much for being here. I appreciate you taking the time to glance at my work. Please Contact Me if I can be of service.

Are you interested in Stampin' Up! products to make your own cards? Shop Now and have a look-see. I placed a HOST CODE for you to use if you do not earn your own rewards. It is sitting in the right sidebar.

Do you like surprises? Subscribe to our Paper Pumpkin and receive all you need to complete the monthly project. The cost is less than $25. Check it out.

Join Me and become privy to everything Stampin' Up! Receive a discount on all of your personal orders. Personally, I love SALES!

Please share, like, pin, tweet, or comment. Do not forget to FOLLOW and SUBSCRIBE to my blog.

HAPPY STAMPING!

Tuesday, March 9, 2021

Sugarplum Butterfly 6x6#23

 I adorned this card front with four strips of designer series paper and one strip of washi tape. What do you think?


Stamps:
   Hold on to Hope

Paper:
   Sweet Sugarplum A-2
   Playful Palette DSP 1 x 4 (4)
   Very Vanilla 1-5/8 x 3-3/8 
   Basic Black 1-3/4 x 3-1/2
   Whisper White 5-1/4 x 4 (Inside)

Ink:
   Archival Basic Black
   Sweet Sugarplum

Technique:
   OSW

Accessories:
   Playful Palette Washi Tape
   Basic Pearl Jewels
   Dimensionals
   Adhesive

This card #23 used Layout #10:


First, I adhered my four strips on the card base. I did not space them out very well. I should have placed the top two strips closer together. I then added the washi tape between them.

I then stamped my sentiment and butterfly on the Very Vanilla piece. I adhered this to the Basic Black piece.

This was then attached to the center of the card base using dimensionals.

Lastly, I placed a pearl on the top of the sentiment and adhered the Whisper White panel to the inside of the card.

If you would like to see all 30 cards in a video go to Merla's No Left-Over DSP Layouts. 

Thank you so much for dropping by here. Contact Me if you have any questions.

Click on all of the tabs above and explore products, promotions, and opportunities.

Please take the time to share, like, pin, tweet, or comment. Do not forget to FOLLOW and SUBSCRIBE to my blog.

HAPPY STAMPING!


Saturday, March 6, 2021

Sending Prayers 6x6#13

This card serves as a reminder that we never accomplish anything alone. Thoughts?


Stamps:
   Itty Bitty Greetings
   Hold on to Hope

Paper:
   Very Vanilla A-2, 1 x 1-1/2, 3-1/4 x 2-1/4
   Playful Palette DSP 3" Sq., 1-1/2" Sq. (3)
   Sweet Sugarplum 3-1/4 x 2-1/4
   Whisper White 5-1/4 x 4 (Inside)

Ink:
   Blushing Bride
   Archival Basic Black

Technique:
   Die Cutting
   Punching

Accessories:
   Cross of Hope Framelits Dies
   Small Oval Punch
   Basic Pearl Jewels
   Dimensionals
   Adhesive

This card used a 3" square from Layout #5:


And three 1-1/2 inch squares from Layout #6:


I really like the cross against the spotted black square. It reminds me of a night sky. Of course, the sentiment can be changed to suit your current need.

First, I stamped and die cut my cross. I then gathered the squares from the two layouts and arranged them on the card.

I stamped and punched out my sentiment. It is adhered directly onto the middle square, which in turn is attached using dimensionals.

Video showing all 30 cards can be seen at Merla's No Left-Over DSP Layouts. 

Thank you so very much for being here. I appreciate you taking the time to glance at my work. Please Contact Me if I can be of service.

Are you interested in Stampin' Up! products to make your own cards? Shop Now and have a look-see. I placed a HOST CODE for you to use if you do not earn your own rewards. It is sitting in the right sidebar.

Do you like surprises? Subscribe to our Paper Pumpkin and receive all you need to complete the monthly project. The cost is less than $25. Check it out.

Join Me and be privy to everything Stampin' Up! Receive a discount on all of your personal orders. Personally, I love SALES!

Please share, like, pin, tweet, or comment. Do not forget to FOLLOW and SUBSCRIBE to my blog.

HAPPY STAMPING!


Monday, May 18, 2020

Falling in Love OSW Yields 9 Cards

Not all paper is created equal. At times, I find a design so beautiful that I cannot even contemplate wasting a tiny corner. That is when my brain shifts to my ONE SHEET WONDER (OSW) thinking cap. Take a peek at the 9 cards and decide if you want to continue reading:


I used one stamp set with about 5 sheets of 8-1/2 x 11 Very Vanilla card stock and one sheet of Basic Black. Throw in 9 pearls, 3 markers, black ink and the matching die cuts and you can make these beautiful cards.

Here is the template:


This is my process:

1. I look at my paper and decide which side will face up. This is very important, especially if I have a design that has a right-side up.

2. Then I need to decide if I want to make vertical cards or horizontal cards. Some designs won't make a difference. Still, a step to consider before cutting.

3. I usually choose vertical cards, so that means that I will hold my paper upright and cut it at 4" and then again at 4". So, now I have 3 panels of 4 x 12. 
   *If I choose horizontal cards, I will cut at 5-1/4" and 5-1/4". This gives me 2 panels with 1-1/2" left over. (Just turn the template on its side.)

4. I then turn my paper on its side and cut at 5-1/4" and 5-1/4". I will have 1 1/2" left.

5. I now have 6 panels measuring 5-1/4 x 4.

6. The three 1-1/2 x 4 strips are cut in half to measure 3/4 x 4. Each pair will be used on a different card. 

7. Lastly, I have to decide if I want to keep all 6 panels intact, or if I want to cut or die cut any of them. If I do, I can then make 2 cards from the one panel. I always use the negative space to make another card. 

I do hope this makes sense. Let me know if you have any questions. 

Here is a close up of each card with a listing of supplies used:


Falling in Love OSW #1 & 2

Stamps:
   Hold on to Hope
Paper:
   Very Vanilla A-2
   Falling in Love DSP 5-1/4 x 4
   Basic Black 2-3/4 x 2
Ink:
   Archival Basic Black
Accessories:
   Cross of Hope Framelits Dies
   Basic Pearl Jewels
   Stamparatus
   Adhesive

Falling in Love OSW #3 & 4

Stamps:
   Hold on to Hope 
Paper:
   Very Vanilla A-2
   Falling in Love DSP 5-1/4 x 4
   Basic Black 2-3/4 x 2
Ink:
   Archival Basic Black
Accessories:
   Cross of Hope Framelits Dies
   Basic Pearl Jewels
   Stamparatus
   Adhesive

Falling in Love OSW #5 & 6

Stamps:
   Hold on to Hope
Paper:
   Very Vanilla A-2
   Falling in Love DSP 5-1/4 x 4
   Basic Black 2-3/4 x 2
Ink:
   Archival Basic Black
Accessories:
   Cross of Hope Framelits Dies
   Basic Pearl Jewels
   Stamparatus
   Adhesive

Falling in Love OSW #7, 8, & 9

Stamps:
   Hold on to Hope
Paper:
   Very Vanilla A-2, 3" Sq.
   Falling in Love DSP 3/4 x 4 (2)
   Basic Black 2 x 3
Ink:
   Archival Basic Black
Markers:
   Garden Green
   Real Red
   Blushing Bride
Accessories:
   Cross of Hope Framelits Dies
   Basic Pearl Jewels
   Stamparatus
   Dimensionals
   Fine Tip Glue Pen
   Adhesive

The cards come together quickly and easily. The most important thing is to let the designer paper do the work. Do not cover it up. Let it speak.

Thank you for taking the time to read through this. There are many OSW layouts. Get creative and design a few. Don't forget to share.

With double-sided designer paper sometimes you just need to flip it over! 

HAPPY STAMPING!