Showing posts with label Note Card. Show all posts

Wednesday, November 13, 2024

Thank You Floral Note

Send a beautiful thank you note, using designer series paper as your backdrop. Thoughts? 


Stamps:
   Painted Glass

Paper:
   Whisper White Note Card 5 x 3-1/2
   Fresh Florals DSP 2-1/2 x 3-1/4
   Basic White 4-3/4 x 3-1/4 (Inside-Optional)

Ink:
   Fresh Fig

Technique:
   CAS

Accessories:
   Basic Rhinestone Jewels
   Adhesive

First, I adhered the Fresh Florals DSP to the front of the Whisper White note card.

I then stamped the sentiment below it, using Fresh Fig ink.

Next, I added one rhinestone between the words.

Lastly, I adhered a Basic White panel to the inside of the card.

This is a wonderful way to use up those leftover pieces of DSP. Don't forget to match the ink to one of the colors found on the DSP and have some fun!

Thank you for stopping to take a peek. Contact Me if you have any questions.

Click on Shop Now and browse through all things Stampin' Up! Start your wish list or order your favorites today. I included a HOST CODE for you to use if you like. Use it only if your product total is less than $150. You can find it in the right sidebar.

Join Me and get the best bang for your buck.

Do you want everything at your fingertips without having to look for it? Subscribe to Paper Pumpkin. Want more choices? Check out the Kit Collection.

One last thing, share, like, pin, tweet, or comment. Don't forget to FOLLOW and SUBSCRIBE to my blog. Okay, that was more than one thing.

HAPPY STAMPING!

Wednesday, November 6, 2024

Just Because Note

Write a quick note to let someone know that you are thinking of them. The care you take with this handwritten gesture will be appreciated much more than a quick text. Thoughts? 


Stamps:
   Vertical Greetings

Paper:
   Whisper White Note Card 5 x 3-1/2
   Fresh Florals DSP 4-3/4 x 2-1/4
   Basic White 4-3/4 x 3-1/4 (Inside)

Ink:
   Fresh Fig

Technique:
   CAS

Accessories:
   Basic Rhinestone Jewels
   Adhesive

First, I adhered the Fresh Florals DSP panel onto the left side of the note card.

I then stamped the sentiment on the right side of the note card, using Fresh Fig ink.

Next, I added a few Basic Rhinestone Jewels below the sentiment.

Lastly, I adhered a Basic White panel to the inside of the note card. This step is optional. 

Thank you so much for spending time with me here. Contact Me if you have any questions.

Shop Now and take a look at all of our new products and current promotions. Please use the HOST CODE sitting in the right sidebar if you did not earn your own rewards.

Subscribe to Paper Pumpkin and keep your monthly cost at $25! Join Me and become my newest team member.

Either way, please share, like, pin, tweet, or comment. Do not forget to FOLLOW and SUBSCRIBE to my blog.

HAPPY STAMPING!

Thursday, October 31, 2024

Christmas Elfie

I matted my Artist Trading Card and added it to a note card. Now, I can send it to someone for Christmas. Thoughts? 


Christmas Elfie

Stamps:
   #Elfie

Paper:
   Whisper White Note Card
   Holiday Fancy Foil Vellum 3-1/4 x 4-3/4
   Real Red/Garden Green 2-3/4 x 3-3/4
   Basic White 2-1/2 x 3-1/2, 3-1/4 x 3-3/4 (Inside)

Ink:
   Tuxedo Black Memento
   Soft Sky 

Markers:
   Daffodil Delight
   Garden Green
   Petal Pink
   Real Red

Technique:
   ATC (Artist Trading Card)
   CAS

Accessories:
   Brights Enamel Shapes
   Glue Dots
   Adhesive

First, I stamped the image and sentiment on the 2-1/2 x 3-1/2 Basic White ATC card. 

I then colored in the image, using the markers listed above.

Next, I stamped the snow, using Soft Sky.

I then matted the card with Real Red or Garden Green.

Next, I adhered the Holiday Fancy Foil Vellum panel onto the Whisper White Note Card. I used glue dots in the center of the vellum where the image can cover them.

I then adhered the matted ATC panel to the center of the card.

Lastly, I added a few enamel shapes and adhered a Basic White panel to the inside of the note card.

Here is another card using the same products listed above. I'm sure you will note the differences. 

Christmas Elfie Too

Thank you so much for hanging out with me today. Contact Me if I can be of service.

Shop Now and browse some exciting new things. There is a HOST CODE in the right sidebar for you to use if you like.

Paper Pumpkin and the Kits Collection are two ways to get a quick fix for the Crafting Bug. Be careful, it is contagious, especially with family.

Join Me and flourish in the goodness that is Stampin' Up! I know you're thinking about it, or you would not have read this far. Check it out and let me know if you need anything.

Please share, like, pin, tweet, or comment. FOLLOW and SUBSCRIBE to my blog.

HAPPY STAMPING!

Friday, September 20, 2024

High Note

Note cards are fun and easier to fill. The smaller canvas somehow makes it all seem rather cute. One stamp can take up the entire front if you let it. Thoughts? 


Stamps:
   High Tide

Paper:
   Whisper White Note Card 5 x 3-1/2, 4-3/4 x 3-1/4 (2)
   Night of Navy 4-7/8 x 3-3/8

Ink:
   Night of Navy
   Pacific Point
   Soft Suede
   So Saffron

Technique:
   Stamp-Off

Accessories:
   Adhesive

First, I stamped the sand at the bottom of the Whisper White panel, using Soft Suede. I stamped-off to get a lighter shade of Soft Suede.

I then stamped the lighthouse, using Pacific Point. This is a two-step stamp, so I inked up the full lighthouse with Pacific Point, but I stamped-off on scratch paper first, and then stamped the white panel. I then took the detailed image of the light house and stamped it over the first image with a full strength of Pacific Point. You may want to play with this on a scratch paper before stamping your panel.

Next, I stamped the sentiment, using Night of Navy on the right side of the lighthouse.

I then added a beam of light with So Saffron ink.

Next, I stamped the birds, using Soft Suede and added gritty sand to the beach. I did NOT stamp-off for these.

I then adhered the panel onto a Night of Navy matte, and then onto the front of the Note Card.

Lastly, I adhered a panel to the inside of the note card. 

Thank you for checking out my blog. I so appreciate your time. Contact Me if you have any questions or concerns regarding Stampin' Up!

Are you curious about what is trending, the cost of materials and other products, or do you just feel like shopping? Click on Shop Now and have some fun.

Subscribe to Paper Pumpkin or check out the Kits Collection if you want to stay on a budget or just keep it all low-key.

Join Me and reap all of the benefits of becoming a part of the Stampin' Up! family. Check it out and gain the best value for your money.

Share, like, pin, tweet, or comment. Don't forget to FOLLOW and SUBSCRIBE to my blog.

HAPPY STAMPING!

Sunday, September 4, 2022

Beyond the Horizon

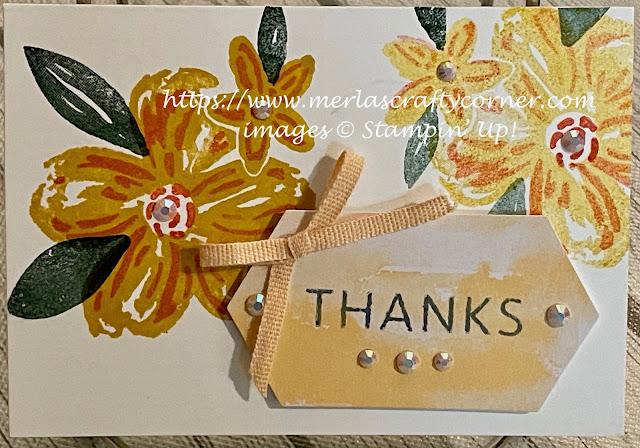
The March, 2022 Paper Pumpkin kit included an extra stamp set for subscribers to use. I made three cards, using left-over tags, ribbon, and embellishments along with the extra stamp set. What do you think?


Beyond the Horizon


Beyond the Horizon Too


Beyond the Horizon Tre


Stamps:
   Beyond the Horizon Extra Paper Pumpkin 3/22

Paper:
   Whisper White Note Card

Ink:
   Bumblebee
   Calypso Coral
   Evening Evergreen
   Misty Moonlight

Technique:
   2-Step Stamping

Accessories:
   Basic Rhinestone Jewels
   Ribbon
   Dimensionals
   Glue Dots
   Adhesive

First, I stamped flowers randomly using Bumblebee ink. This was step 1. I also stamped the flower twice without re-inking to get a color variation.

I then stamped the details on the flowers using Calypso Coral ink. This was step 2. Again, I stamped twice without re-inking for a color variation.

Next, I added leaves using Evening Evergreen.

The tags were stamped in Misty Moonlight and added using dimensionals.

Lastly, I added ribbon and rhinestones.

Thank you so much for dropping by here. Contact Me if you have any questions.

Click on all of the tabs above and explore products, promotions, and opportunities.

Please take the time to share, like, pin, tweet, or comment. Do not forget to FOLLOW and SUBSCRIBE to my blog.

HAPPY STAMPING!


Wednesday, August 11, 2021

Open Delicate Dahlias

If you really want to make it simple, don't fill in the images with color. The line images are just as beautiful as the ones with color. What do you think?


Stamps:
   Delicate Dahlias

Paper:
   Whisper White Note Card

Ink:
   Garden Green
   Highland Heather
   Tuxedo Black Memento

Technique:
   CAS

Accessories:
   None

Thank you so much for spending time with me here. Contact Me if you have any questions.

Shop Now and take a look at all of our new products and current promotions. Please use the HOST CODE sitting in the right sidebar if you did not earn your own rewards.

Subscribe to Paper Pumpkin and keep your monthly cost below $25! Join Me and become my newest team member.

Either way, please share, like, pin, tweet, or comment. Do not forget to FOLLOW and SUBSCRIBE to my blog.

HAPPY STAMPING!

Tuesday, August 10, 2021

Filled Delicate Dahlias

I was challenged to take a SIP: Stamps, Ink, and Paper. So, I did. Simplicity in essence should be very simple, but I sometimes find it difficult to stop. For example, I will probably dress this card up more by adding rhinestones or pearls. I might even add a tiny bow. What do you think?


Stamps:
   Delicate Dahlias

Paper:
   Whisper White Note Card

Ink:
   Garden Green
   Highland Heather
   Tuxedo Black Memento

Technique:
   2-Step Stamping
   Stamp-Off
   CAS

Accessories:
   None

First, I stamped the dahlias using the solid image only and inking my stamp with Highland Heather. I stamped one dahlia on the lower center of my note card and then added partial images around it.

Next, I added leaves to the dahlias. I stamped the solid leaf image using Garden Green. I did stamp-off on a scrap piece of paper before stamping on my card. 

Lastly, I added my sentiment using Tuxedo Black Memento. 

I think the card is beautiful and finished. Still, I love the sparkle, but since it is a sympathy card, I will more than likely add a pearl or two on the center dahlia only. Thoughts?

Thank you so much for stopping by here and taking a quick look-see. If you have any questions or need my assistance, Contact Me.

Shop Now and take a look at all of our new products and current promotions. Please use the HOST CODE sitting in the right sidebar if you did not earn your own rewards.

If you want to craft, but keep your costs below $25 a month, check out Paper Pumpkin. It just might be what you are looking for at the moment.

Join Me and become the newest member of my team. Remember there are no hidden agendas or penalties for giving it a go. Don't pass this opportunity to save.

You've come this far, so please share, like, pin, tweet, or comment. I appreciate your time and efforts. Let me know your thoughts and leave all of your questions behind. Do not forget to FOLLOW and SUBSCRIBE to my blog.

HAPPY STAMPING!
 

Friday, May 28, 2021

Beautiful Birthday Note

 I like the simplicity of this card. The font on the sentiment adds a lovely touch to it. Thoughts?


Stamps:
   Painted Glass

Paper:
   Whisper White 5 x 3-1/2 (Note Cards)
   Fresh Fig 2-3/4 x 3
   Fresh Florals DSP 2-1/4 x 2-1/2

Ink:
   Fresh Fig

Technique:
   CAS

Accessories:
   Basic Rhinestone Jewels
   Adhesive

First, I adhered my Fresh Florals DSP to a Fresh Fig matte. 

I then adhered this to the top center of a note card. If you do not have note cards, you can make your own: 5 x 7 score at 3-1/2, gives you a 5 x 3-1/2 card.

I then stamped my sentiment on the bottom center using Fresh Fig ink. 

Lastly, I added a couple of rhinestones to the centers of the florals.

This is an easy way to use scraps or odd pieces of DSP. Create corners or strips on one side and center your sentiment. Note cards are great to keep on hand. 

Thank you for visiting. I do love company. Feel free to Contact Me if you have any questions.

Explore current products, promotions, and all of the opportunities, just click on Shop Now. A HOST CODE is available in the right sidebar for those of you who do not earn your own rewards.

For those of you who like kits with everything you need to complete a project, we offer Paper Pumpkin. You monthly cost is less than $25.

Join Me and become my newest team member. Take a peek for an extra offering that ends May 31, 2021. I look forward to meeting you.

Please take a minute to share, like, pin, tweet, or comment. Do not forget to FOLLOW and SUBSCRIBE to my blog.

HAPPY STAMPING!


Sunday, February 21, 2021

Thoughtful Rosie

 I like to keep a package of note cards at the ready in case I need to make a stack of cards. Since the base is 5 x 7 scored at 3-1/2, the card must be clean and simple. This means you only need three ingredients: stamps, ink, and paper. I like to keep the ink to one color. If the recipient wants two colors, I will stamp the sentiment in another color. Here are two thank you cards to demonstrate what I mean. What do you think?


Stamps:
   Floral Phrases

Paper:
   Whisper White 5 x 7 Note Card

Ink:
   Blueberry Bushel
   Merry Merlot

Technique:
   CAS

Accessories:
   None

These note cards and envelopes are sold in a package of 20 for $7, item #159232. Order HERE. They are also sold in Very Vanilla.

First, I stamped the floral design on the top of the card.

I then stamped the sentiment in the middle of the card front.

Lastly, I stamped the floral border on the bottom third of the card.

Using a Stamparatus or MISTI tool will speed the process, guarantee exact placement, and keep all of the cards uniform.

Thank you so much for dropping by here. Contact Me if you have any questions.

Click on all of the tabs above and explore products, promotions, and opportunities.

Please take the time to share, like, pin, tweet, or comment. Do not forget to FOLLOW and SUBSCRIBE to my blog.

HAPPY STAMPING!


Friday, January 1, 2021

Shining Light Rays

 Having a smaller canvas to work with can be easier when you are creating a card. This is a note card size. You can buy this size in white and vanilla. There are 20 scored cards with envelopes. All you do is add to the card front and write or stamp on the inside. Of course, you have to mail it too! I like to keep two or three packs handy. What do you think?


Stamps:
   High Tide

Paper:
   Whisper White 5 x 3-1/2 (Note Card), 4-3/4 x 3-1/4
   Night of Navy 4-7/8 x 3-3/8

Ink:
   Night of Navy
   Pacific Point
   Crumb Cake
   Soft Suede
   Daffodil Delight

Technique:
   Sponging
   Masking

Accessories:
   Adhesive

First, I stamped the sun and rays using a sponge and a straight edge.

Next, I stamped the beach on the bottom left using Crumb Cake.

I then decided to stamp my sentiment on the top right with Night of Navy. This way my water level would not go up too high. 

I then masked off my beach area using a sticky note. I then stamped my water using Pacific Point. It is a small stamp, so I did stamp over and over until I was happy with it. The idea was to keep the horizon as straight as I could.

Lastly, I stamped my gulls. I did not realize that the blue water was going to come through the Soft Suede. I don't think it is that noticeable. I think I may try using Basic Black, or stamping and masking them before stamping the water. Any suggestions?

Thank you for visiting. I do love company. Feel free to Contact Me if you have any questions.

Explore current products, promotions, and all of the opportunities, just click on Shop Now. A HOST CODE is available in the right sidebar for those of you who do not earn your own rewards.

For those of you who like kits with everything you need to complete a project, we offer Paper Pumpkin. Your monthly cost is less than $25.

Join Me and become my newest team member. I look forward to meeting you.

Please take a minute to share, like, pin, tweet, or comment. Do not forget to FOLLOW and SUBSCRIBE to my blog.

HAPPY STAMPING!