Showing posts with label Something to Celebrate. Show all posts

Friday, December 24, 2021

Peek a Boo Celebrations

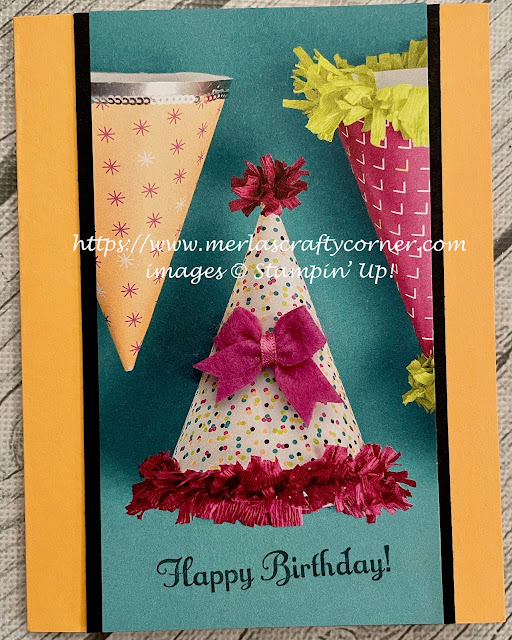
This designer series paper is so perfect, all I had to do was stamp a sentiment on the bottom and attach it to a card. It truly is picture perfect. Thoughts? 


Stamps:
   Something to Celebrate

Paper:
   Peek a Boo Peach A-2
   Basic Black 5-1/2 x 3-1/4
   Picture Perfect DSP 5-1/2 x 3
   Basic White 5-1/4 x 4 (Inside)

Ink:
   Tuxedo Black Memento

Technique:
   CAS

Accessories:
   2017-2019 In-Color Bitty Bows
   Adhesive

First, I stamped my sentiment on the bottom of the DSP panel, using Tuxedo Black Memento.

I then adhered the DSP panel onto the Basic Black panel and then onto the Peek a Boo Peach card front.

Next, I adhered a bitty bow in the middle of the party hat and added the Basic White panel to the inside of the card.

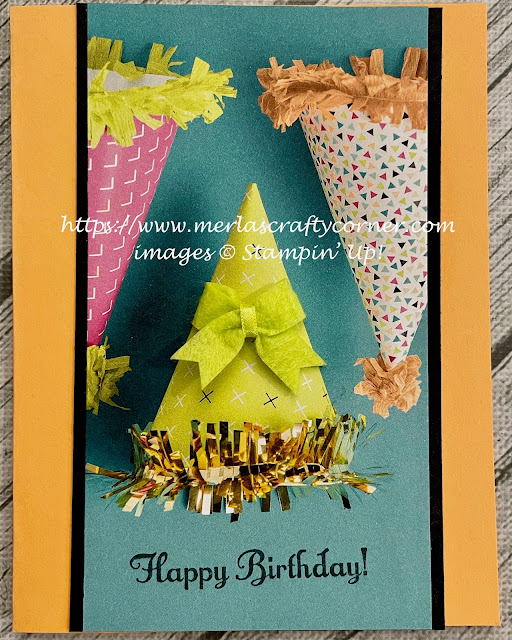
Here is another card, using a different color bow.

Peek a Boo Celebrations Too


Thank you for visiting. I do love company. Feel free to Contact Me if you have any questions.

Explore current products, promotions, and all of the opportunities. Just click on Shop Now. A HOST CODE is available in the right sidebar for those of you who do not earn your own rewards.

For those of you who like kits with everything you need to complete a project, we offer Paper Pumpkin. Your monthly cost is less than $25. Also, you might want to look at the new Kits Collection!

Join Me and become my newest team member. I look forward to meeting you.

Please take a minute to share, like, pin, tweet, or comment. Do not forget to FOLLOW and SUBSCRIBE to my blog.

HAPPY STAMPING!

Saturday, October 9, 2021

Baby Girl

Can you see the rattles stamped in the background? They are subtle, so you have to look for them. This is a very simple layout using some items from my stash. What do you think?


Stamps:
   Year After Year
   Something to Celebrate
   Teddy and Train

Paper:
   Blushing Bride A-2
   All Abloom DSP 5-1/2 x 3
   Whisper White 2-1/4 x 2-3/4, 3/4 x 2-3/4, 5-1/4 x 4

Ink:
   Archival Basic Black

Markers:
   Blushing Bride
   Soft Suede
   Basic Gray

Technique:
   Sponging
   Die Cutting
   Punching

Accessories:
   Bitty Banners Dies
   Soft Subtles Brads
   Ticket Corner Punch
   Sponge
   Dimensionals
   Adhesive

First, I stamped rattles over the card front, using Blushing Bride ink.

Next, I stamped and colored my image on a 2-1/4 x 2-3/4 inch piece of Whisper White. I sponged the panel and punched the corners with my ticket corner punch.

I then adhered the stamped image to the bottom of a DSP panel and added a pink brad to each of the corners.

I adhered the DSP panel to the center of my card front.

Next, I stamped, die cut, and sponged my sentiment banner. I attached it using dimensionals.

Lastly, I adhered the 5-1/4 x 4 inch Whisper White panel to the inside of the card.

Thank you so much for stopping by here. Contact Me if you have any questions.

Shop Now and buy your supplies to make your own cards. Take a peek today and find out what you can grab for FREE!

Join Me and become my new team member. Enjoy the best savings and opportunity offered today!

Subscribe to Paper Pumpkin and craft monthly for under $25. Don't forget to take a look at the All-Inclusive Kits!

If you liked my card, please share, like, pin, tweet, or comment. I would love for you to FOLLOW and SUBSCRIBE to my blog.  Let me know what you think in the comments below.

HAPPY STAMPING!

Monday, July 19, 2021

Anniversary in Ivory

This is a Clean And Simple (CAS), yet elegant anniversary card. It takes less than five minutes to create. Of course, the sentiment can be changed to any current need you may have. What do you think?


Stamps:
   Something to Celebrate

Paper:
   Very Vanilla A-2, 5-1/4 x 4 (2)

Ink:
   Archival Basic Black

Technique:
   Dry Embossing
   CAS

Accessories:
   Ellison Embossing Folder by Sizzix
   Adhesive

First, I took a Very Vanilla panel and dry embossed it using an embossing folder by Sizzix.

I then stamped my sentiment in the designated space using Archival Basic Black.

Next, I adhered this panel onto the Very Vanilla card front and added the other panel to the inside of the card.

I kept this card CAS. Still, if you want to add some embellishments, you can easily add a ribbon, rhinestones, or possibly pearls. If you would like to add dimension, stamp your sentiment on a tag and attach it using dimensionals. The possibilities are endless. Have fun!

Thank you so much for stopping by here and spending a few minutes of your day with me. I appreciate your time. Contact Me if you have any questions, need a demonstrator, or just want to stamp or share ideas.

Shop Now and enjoy browsing products and promotions. I have a HOST CODE in the right sidebar in case you do not earn your own rewards.

Do not miss the opportunity to Join Me and become the newest member of my team.

Paper Pumpkin should not be ignored. I enjoy putting my kit together monthly.

Take a few more minutes and share, like, pin, tweet, or comment. I would love to see what you really think. Do not forget to FOLLOW and SUBSCRIBE to my blog.

HAPPY STAMPING!

Saturday, December 19, 2020

Bubbly Seahorses

 Did you know that hair gel can look like water? It even has air bubbles in it! I made this birthday card for my grandson and already gave it to him. He just loved playing with the gel on the card. Amazingly, it is not too difficult to make! 


Stamps:
   By the Tide
   Something to Celebrate

Paper:
   Marina Mist A-2, Scraps
   Whisper White 5-1/4 x 4 (2), Scraps

Ink:
   Archival Basic Black
   Early Espresso
   Marina Mist
   Pistachio Pudding

Technique:
   Hair Gel or Water Shaker
   Dry Embossing
   Die Cutting
   Punching
   Sponging

Accessories:
   Seaside Embossing Folder
   Layering Circles Framelits Dies
   Washi Label Punch
   Small Ziplock Clear Plastic Bag 
   Tear & Tape Adhesive
   Basic Pearl Jewels
   Sponge
   Dimensionals
   Adhesive

These are all of the items I used to make my card, but you can substitute what you have on hand. You may also choose to delete some of the things I did on my card. Keep it simple.

First, I inked up my embossing folder and ran it through the big shot using my Seaside Embossing Folder. I then used my Layering Circles Framelits to cut out a circle in the top center of my panel.

I then penciled this circle onto a scrap of Whisper White, larger than the circle, but smaller than the embossed panel. 

Next, I stamped some Pistachio Pudding Seaweed onto the Whisper White panel, using the penciled circle as my window. I also stamped 3 Seahorse Silhouettes on top of the seaweed.

Using the same size circle and the next larger size circle, I die cut the frame that will go around this circle in Marina Mist. 

I added hair gel to the small ziplock clear plastic bag. I made sure the bag was not going to leak any gel onto my card. This was then secured over the stamped image, using strong adhesive. 

Next, I added strong adhesive to this smaller panel and secured it onto the back of my embossed panel, making sure the image and hair gel were centered on my circle.

I added the circle frame around the opening and positioned pearls around it. I attached the sentiment on the bottom using dimensionals.

This was all then added to the card base. The other Whisper White panel was for the inside of the card.

I took this idea from Dawn's video. You can see it HERE

Thank you so much for stopping by here. Contact Me if you have any questions.

Shop Now and buy your supplies to make your own cards.

Join Me and become my new team member.

Subscribe to Paper Pumpkin and craft monthly for under $25.

If you liked my card, please share, like, pin, tweet, or comment. I would love for you to FOLLOW and SUBSCRIBE to my blog. Let me know what you think in the comments below.

HAPPY STAMPING!

Monday, October 12, 2020

Cupcakes

 It seems like more people are celebrating with cupcakes instead of cakes nowadays. On the upside, there is less cleanup, and everyone gets the same amount. There is no more fighting for the corner piece or the one with the flower on top. So, everyone get the same, but is treated like an individual with their own serving. 


Stamps:
   Crazy for Cupcakes
   Something to Celebrate

Paper:
   Crushed Curry A-2
   Whisper White 5-1/4 x 4, 3-1/2 x 2-1/2
   Cherry on Top DSP 5-1/4 x 4
   Pool Party 3-3/4 x 2-3/4

Ink:
   Archival Basic Black

Markers:
   Real Red
   Bermuda Bay
   Cucumber Crush
   Watermelon Wonder

Technique:
   CAS

Accessories:
   Dimensionals
   Adhesive

I stamped my cupcakes using Archival Basic Black. I then colored them using the markers listed above.

I stamped the sentiment on the bottom, and added it to the Pool Party panel. I attached it to the card base panel using dimensionals. 

The Cherry on Top DSP was added to the card base before the cupcake panel.

Thank you so much for dropping by here. Contact Me if you have any questions.

Click on all of the tabs above and explore products, promotions, and opportunities.

Please take the time to share, like, pin, tweet, or comment. Do not forget to FOLLOW and SUBSCRIBE to my blog. 

HAPPY STAMPING!

Thursday, June 4, 2020

Dad's Day

Stamps, ink and paper is all the beginner crafter needs to make a card. If you want to Step-It-Up, you can add a simple technique like sponging or flagging a sentiment. Then you can easily become an Avid crafter by adding more embellishments like ribbon or other elements. Check out this Father's Day Card:


Stamps:
   The Open Sea
   Something to Celebrate

Paper:
   Early Espresso A-2
   Whisper White 2-1/2" Circle, Scrap
   Adventure Bound DSP 5-1/4 x 4

Ink:
   Early Espresso

Technique:
   Sponging

Accessories:
   2-1/2" Circle Punch
   Sponge
   4-3/4" Ribbon
   Paper Snips
   Dimensionals
   Adhesive

Always remember to stamp first and then punch out your image. This way your image is exactly where you want it. I did the same for the sentiment. I stamped, and then I snipped it down to size. 

Next, I sponged the edges of the circle and the sentiment using Early Espresso ink.

I propped up the image and sentiment using dimensionals.

Note the sentiment can be changed to whatever you need. 

Thank you for stopping by here. Our new annual catalog is now live. Check out the new products by clicking on Shop Now above. 


HAPPY STAMPING!