This pack of New Horizons Designer Series Paper does all of the work for you. The possibilities are unlimited. You can stamp on it, or you can choose to simply adorn your card front with it. Below are four different cards I made using only one sheet from the pack. What do you think?

Happy Birthday Horizon

Relax Horizon

Thinking of You Horizon

Thank You Horizon
Stamps:
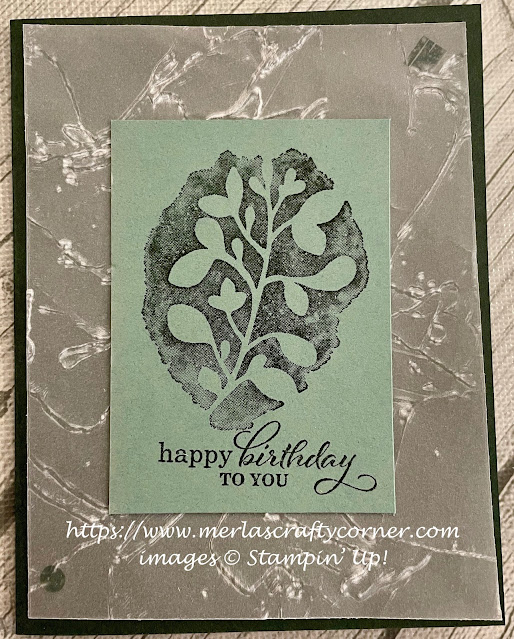
On the Horizon
Best Year
Grassy Grove
Paper:
Basic White A-2, 5-1/4 x 4 (Inside)
Basic Black 3-1/8" Sq.
New Horizons DSP 3" Sq.
Ink:
Tuxedo Black Memento
Technique:
CAS
Accessories:
Basic Rhinestone Jewels
Basic Pearl Jewels
Dimensionals
Adhesive
First, I cut my 6x6 DSP sheet into 3" Squares.
I then stamped each of the squares. The trees on the Thank You card are from the Grassy Grove Stamp Set. All of the other images are from On the Horizon Stamp Set.
I matted the four squares using Basic Black and attached them with dimensionals.
Next, I stamped the sentiments. The birthday and thank you sentiments are from the Best Year Stamp Set. The others use On the Horizon Stamp Set.
Lastly, I added rhinestones or pearls to the card fronts and adhered a Basic White panel to the inside of each card.
Thank you so much for stopping by here and taking a quick look-see. If you have any questions or need my assistance, Contact Me.
Shop Now and take a look at all of our new products and current promotions. Please use the HOST CODE sitting in the right sidebar if you did not earn your own rewards.
If you want to craft, but keep your costs below $25 a month, check out Paper Pumpkin. It just might be what you are looking for at the moment.
Join Me and become the newest member of my team. Remember there are no hidden agendas or penalties for giving it a go. Don't pass this opportunity to save.
You've come this far, so please share, like, pin, tweet, or comment. I appreciate your time and efforts. Let me know your thoughts and leave all of your questions behind. Do not forget to FOLLOW and SUBSCRIBE to my blog.
HAPPY STAMPING!