Showing posts with label Natural Prints Dies. Show all posts

Friday, June 16, 2023

Blackberry Thank You

I do like the images on this designer series paper. They seem to just reach out and grab you. I think it makes this paper very versatile and will definitely blend in with any sentiment you choose. What do you think? 


Stamps:
   Nature's Prints

Paper:
   Blackberry Bliss A-2, Scraps
   Basic White 5-1/4 x 4 (Inside)
   Pretty Prints DSP 5-1/4 x 4, 1-1/2 x 4
   Gold Foil Paper 1/8 x 4 (2)

Ink:
   Blackberry Bliss

Technique:
   Die Cutting

Accessories:
   Natural Prints Dies
   Cross of Hope Framelits
   Basic Pearl Jewels
   Adhesive

First, I die cut the two small Blackberry Bliss florals, using the Natural Prints Dies.

I then cut my DSP panel and strip. The strip is the reverse side of the DSP. 

Next, I stamped the sentiment in the center of the strip and adhered the two die cuts on either side.

I then adhered the strip to the DSP panel and added a gold strip to the top and bottom of it.

Next, I adhered the DSP panel to the Blackberry Bliss card front, and added a gold cross to the top right corner. The gold cross was die cut, using the Cross of Hope Framelits.

Lastly, I added a few pearls and adhered the Basic White panel to the inside of the card.

Thank you for checking out my blog. I so appreciate your time. Contact Me if you have any questions or concerns regarding Stampin' Up!

Are you curious about what is trending, the cost of materials and other products, or do you just feel like shopping? Click on Shop Now and have some fun.

Subscribe to Paper Pumpkin or check out the Kits Collection if you want to stay on a budget or just keep it all low-key.

Join Me and reap all of the benefits of becoming a part of the Stampin' Up! family. Check it out and gain the best value for your money.

Share, like, pin, tweet, or comment. Don't forget to FOLLOW and SUBSCRIBE to my blog.

HAPPY STAMPING!

Thursday, May 25, 2023

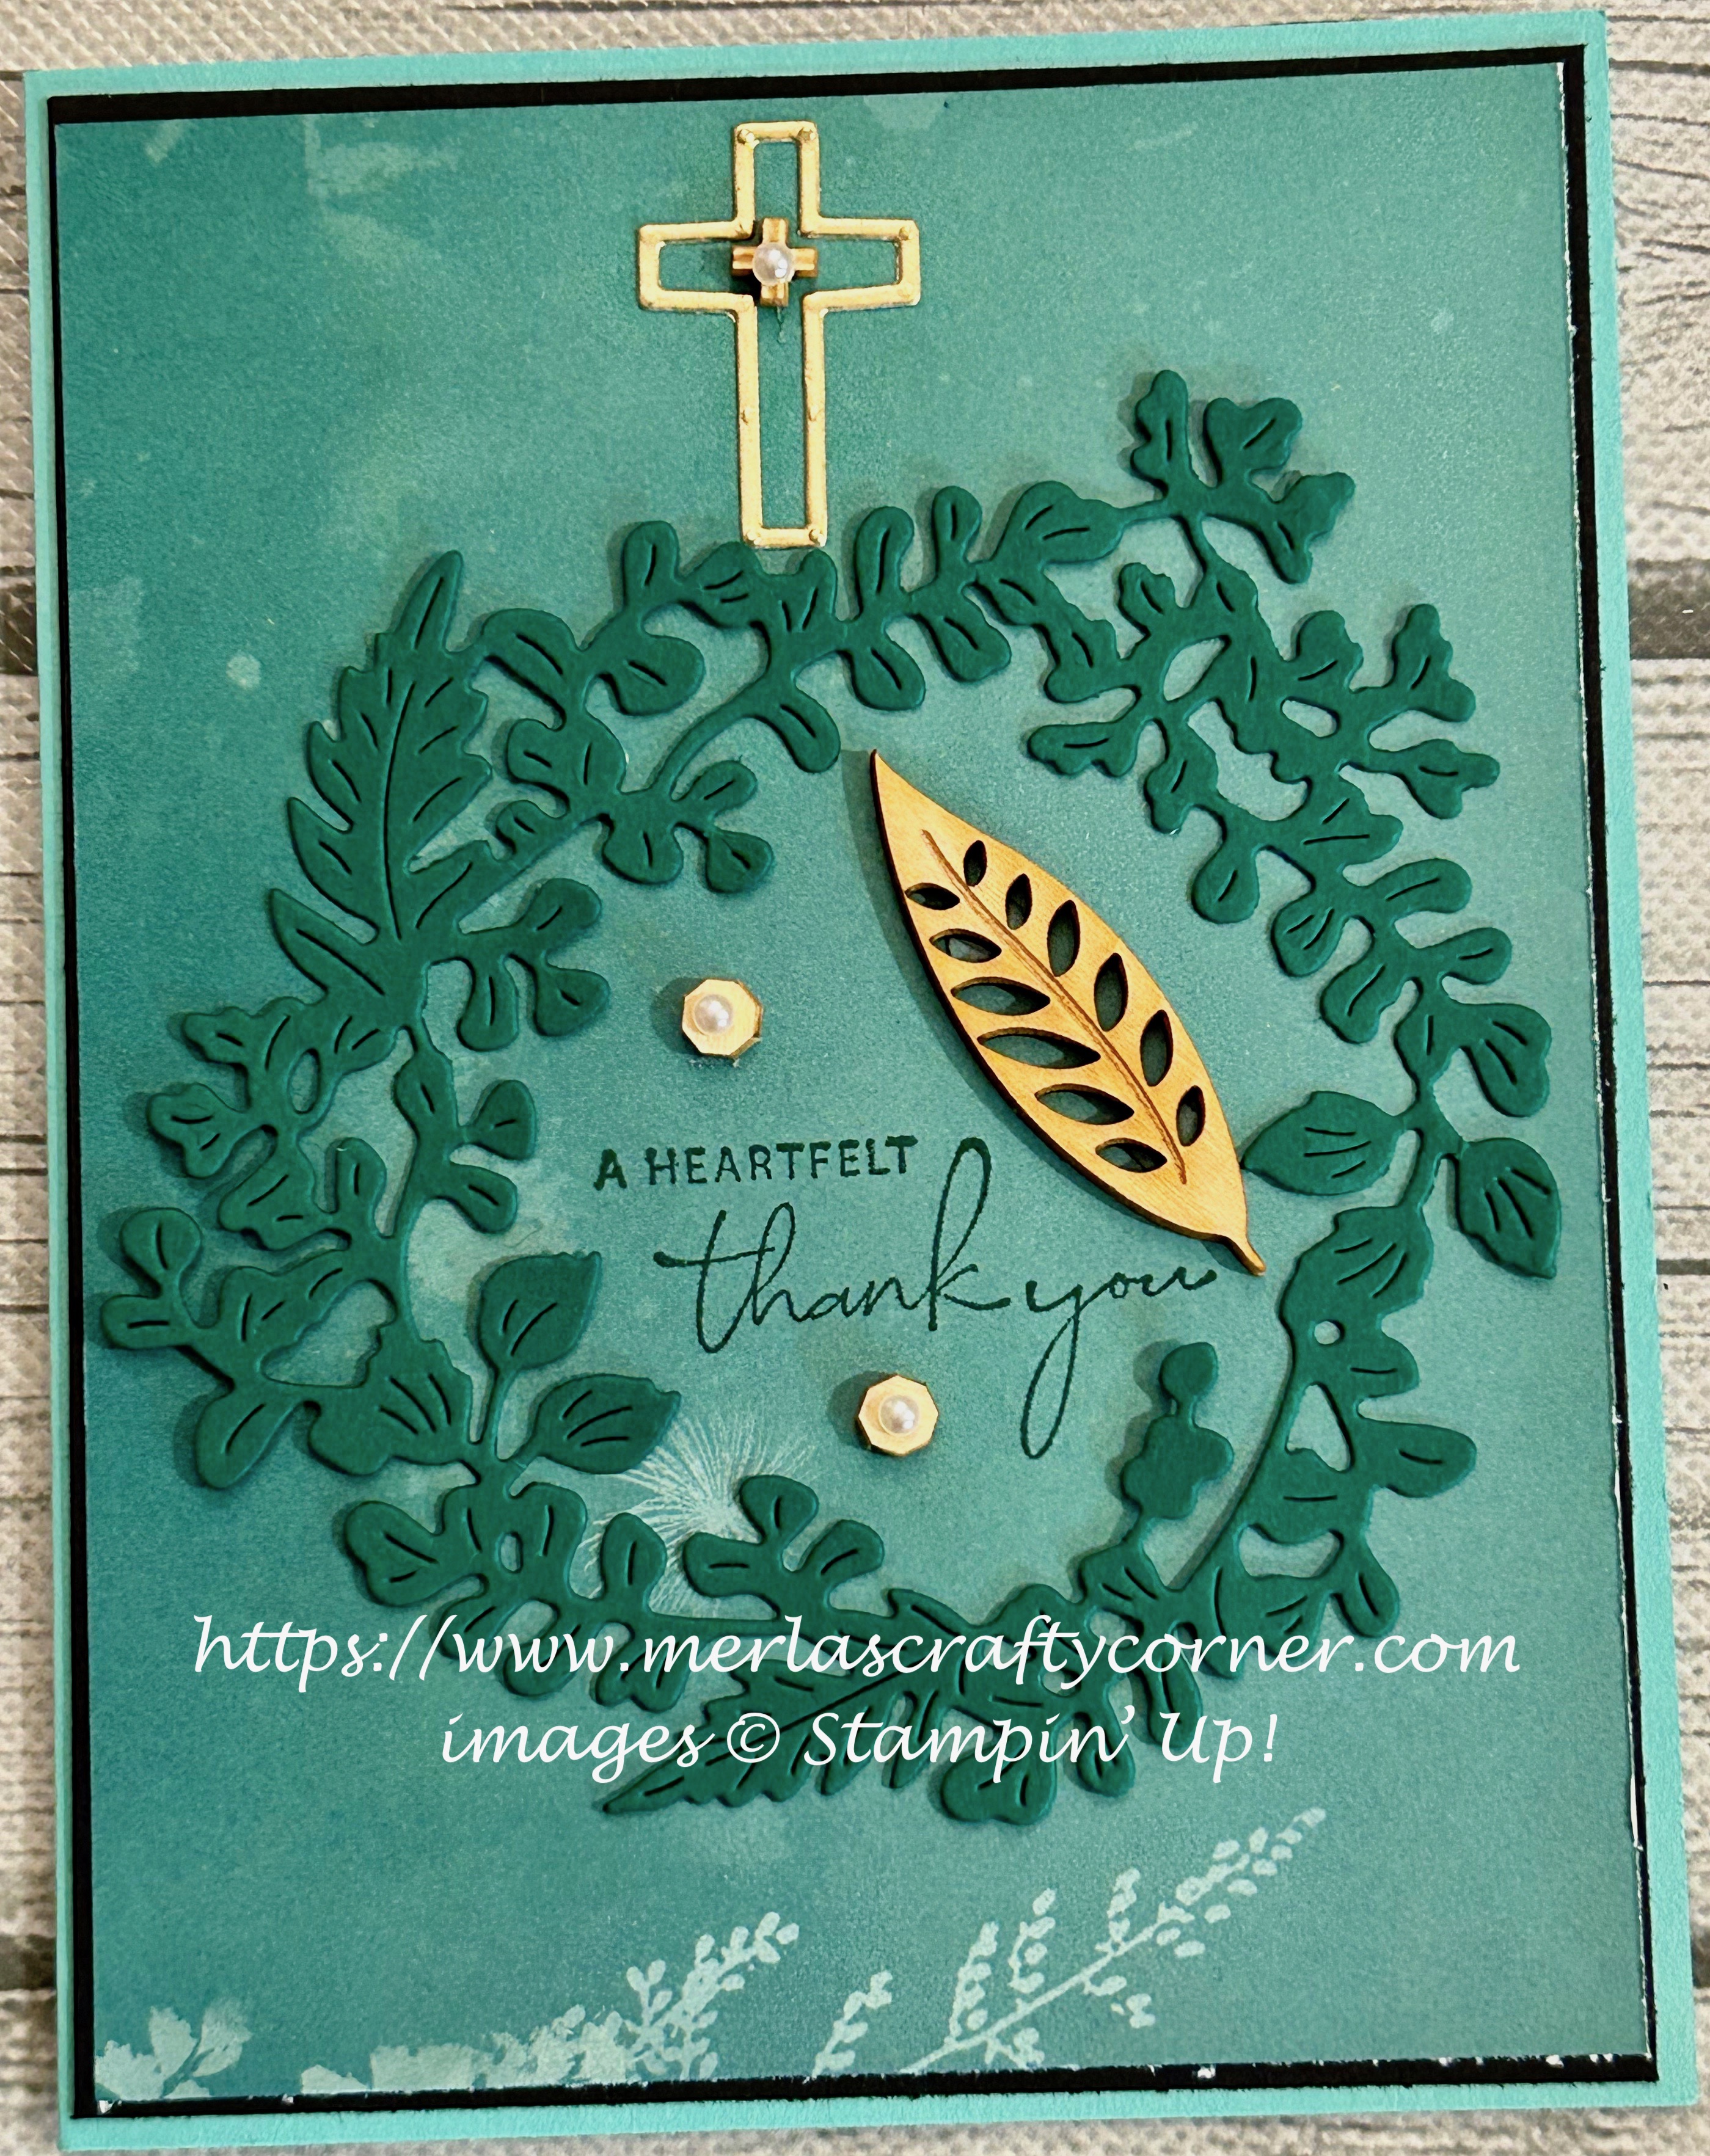
Thank You Nature

Use natural elements to express thanks. I decided to add some wooden elements to my card. I had some tiny flowers, a cross, and a leaf. I think they work well with the die cut wreath and golden cross. What do you think? 


Stamps:
   Nature's Prints

Paper:
   Coastal Cabana A-2
   Basic Black 5-3/8 x 4-1/8
   Pretty Prints DSP 5-1/4 x 4
   Shaded Spruce 4 x 4-1/4
   Basic White 5-1/4 x 4 (Inside)
   Gold Foil Paper Scraps

Ink:
   Shaded Spruce

Technique:
   Die Cutting

Accessories:
   Natural Prints Dies
   Cross of Hope Framelits
   In Good Taste Elements
   Basic Pearl Jewels
   Glue Dots
   Adhesive

First, I die cut my wreath, using Natural Prints Dies and a piece of Shaded Spruce card-stock.

I then took a scrap of Gold Foil and die cut a small cross, using Cross of Hope Framelits.

Next, I adhered the DSP panel to the Basic Black matte and then onto the Coastal Cabana card front.

I arranged the wreath and cross on my card front, and adhered them with some liquid adhesive.

I then loosely arranged the wooden elements on the card front. I stamped the sentiment in place, and then adhered the wooden elements, using glue dots.

Lastly, I added the small wooden cross in the center of the gold foil cross and adhered the Basic White panel to the inside of the card.

I am so excited that you stopped to read and check out my work. Thank you from the bottom of my heart. Contact Me and let me know if there is anything I can answer for you. 

Do you have some time to browse? You do not want to pass up the opportunity to shop some quality products and see what is trending. Shop Now and take a peek. If you decide to place an order, I have included a HOST CODE in the right sidebar if you do not earn any rewards on your own. Thanks in advance.

Are you undecided? Subscribe to Paper Pumpkin and give it a go. Let the products speak for themselves. The cost is less than $25 and you are completely in control. No small print for you to miss. Try it.

Join Me and gain the best value for your hard-earned money. Check it out now.

Share, like, pin, tweet, or comment. Come on, I dare you. Don't forget to FOLLOW and SUBSCRIBE to my blog.

HAPPY STAMPING!
Friday, May 12, 2023

Fernly Thoughts

Grab an embossing folder and a panel of vellum to create a beautiful background. What do you think?


Stamps:
   Nature's Prints
   Quiet Meadow

Paper:
   Evening Evergreen A-2
   Vellum 5-1/2 x 4-1/4
   Basic White 1-3/4 x 2-1/2 (2), 1 x 3, 5-1/4 x 4 (Inside)

Ink:
   Evening Evergreen

Technique:
   Dry Embossing
   Die Cutting

Accessories:
   Fern 3D Embossing Folder
   Meadow Dies 
   Natural Prints Dies
   2021-2023 In-Color Jewels
   Glue Dots
   Dimensionals
   Adhesive

First, I placed my vellum panel inside the Fern 3D embossing folder and ran it through the embossing machine. 

I added a few glue dots to the back center of the panel and adhered it onto the Evening Evergreen card base. I checked all the edges and trimmed the vellum if it needed it. It was a perfect fit.

Next, I stamped and die cut the two ferns and the sentiment. The fern leaf die cut is from the Natural Prints Dies, and the die cut for the sentiment can be found in the Meadow Dies.

I added the ferns with glue dots and the sentiment was attached using dimensionals.

Lastly, I added two jewels on the sentiment and adhered the Basic White panel to the inside of the card.

Thank you for visiting. I do love company. Feel free to Contact Me if you have any questions. 

Explore current products, promotions, and all of the opportunities. Just click on Shop Now. A HOST CODE is available in the right sidebar for those of you who do not earn your own rewards.

For those of you who like kits with everything you need to complete a project, we offer Paper Pumpkin. Your monthly cost is less than $25. Also, you might want to look at the new Kits Collection!

Join Me and become my newest team member. I look forward to meeting you.

Please take a minute to share, like, pin, tweet, or comment. Do not forget to FOLLOW and SUBSCRIBE to my blog.

HAPPY STAMPING!

Order what you need to make Fernly Thoughts!

Thursday, May 12, 2022

Fernly Thanks

Adding dimensionals between layers can really make your images pop. What do you think?


Stamps:
   Nature's Prints
   Beyond the Horizon, 03/2022 Paper Pumpkin

Paper:
   Soft Suede A-2
   Soft Sea Foam 5-1/4 x 4
   Basic White 5-1/4 x 4 (Inside), Scraps

Ink:
   Garden Green
   Soft Sea Foam
   Soft Suede

Technique:
   Die Cutting
   Dry Embossing
   Blending Brush/Sponging

Accessories:
   Natural Prints Dies
   Fern 3D Embossing Folder
   In Good Taste Elements
   Paper Pumpkin Tag
   Glue Dots
   Dimensionals
   Adhesive

First, I dry embossed my Soft Sea Foam panel. I misted it with a bit of water to soften the fibers. This keeps it from tearing.

I then used a blending brush to add some Soft Sea Foam ink. It brought out the embossed images a bit more.

Next, I stamped the various leaves on scraps of Basic White, using Garden Green and Soft Suede.

I then die cut them and arranged them on my panel. I adhered one fern leaf and the Soft Suede bunch using liquid adhesive. I then added the large leaves with dimensionals. Lastly, I added liquid glue and one dimensional to the bottom fern.

Next, I stamped a left-over Paper Pumpkin tag and added it with dimensionals.

I then adhered this panel to the Soft Suede card front.

Lastly, I added a wooden leaf to the card front and adhered the Basic White panel to the inside of the card.

Thank you so much for being here. I appreciate you taking the time to glance at my work. Please Contact Me if I can be of service.

Are you interested in Stampin' Up! products to make your own cards? Shop Now and have a look-see. I placed a HOST CODE for you to use if you do not earn your own rewards. It is sitting in the right sidebar.

Do you like surprises? Subscribe to Paper Pumpkin and receive all you need to complete the monthly project. The cost is less than $25. Check it out.

Join Me and become privy to everything Stampin' Up! Receive a discount on all of your personal orders. Personally, I love SALES!

Please share, like, pin, tweet, or comment. Do not forget to FOLLOW and SUBSCRIBE to my blog.

HAPPY STAMPING!