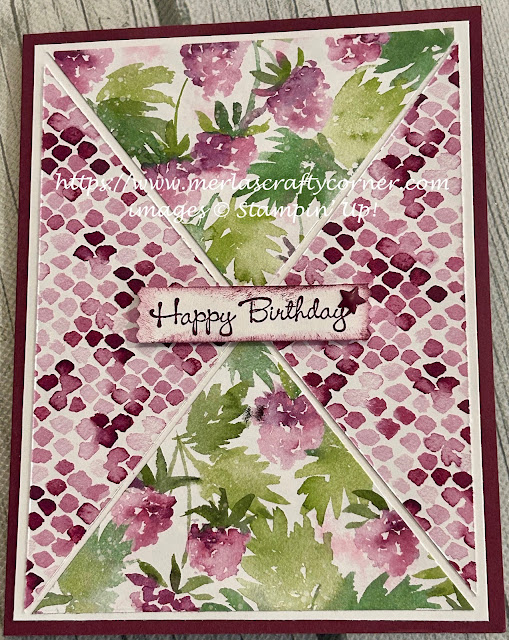
Draw attention to your card simply by cutting the designer series paper (DSP) differently. Using two-sided paper makes this even easier because all you have to do is flip two sides. What do you think?
Stamps:
Go To Greetings
Paper:
Rich Razzleberry A-2
Basic White 5-1/4 x 4 (2), Scrap
Berry Delightful DSP 5 x 3-3/4
Ink:
Rich Razzleberry
Technique:
Sponging
Punching
Accessories:
Brights Enamel Shapes
Washi Label Punch
Sponge
Dimensionals
Adhesive
First, I cut the DSP panel. I lined up two opposite ends of the DSP on the cutting line and cut the paper on the diagonal. This gave me two large triangles.
Keeping the paper together, I slid the paper to the other two opposite corners and diagonally cut the DSP. I now had 4 triangles.
I then flipped over the left and right triangles to give me a view of the other side of the DSP.
Next, I adhered these triangles on to a Basic White panel. I left a little space between the panels as shown above.
I then adhered this panel on to the Rich Razzleberry card front.
Next, I stamped, punched, and sponged the sentiment. You can change this to whatever you need. I adhered it to the center of the card, using dimensionals.
Lastly, I added an enamel star shape to the sentiment, and adhered the other Basic White panel to the inside of the card.
Thank you so much for spending time with me here. Contact Me if you have any questions.
Shop Now and take a look at all of our new products and current promotions. Please use the HOST CODE sitting in the right sidebar if you did not earn your own rewards.
Subscribe to Paper Pumpkin and keep your monthly cost below $25! Join Me and become my newest team member.
Either way, please share, like, pin, tweet, or comment. Do not forget to FOLLOW and SUBSCRIBE to my blog.
HAPPY STAMPING!

No comments:
Post a Comment